Profile Top
Profile Top - SaaS Based Portfolio Builder CMS
- By: websolutionus
- Email: websolutionus1@gmail.com
Introduction
Profile Top is a SaaS Based Portfolio Builder CMS. You can make a package Free or Premium. In this software, users can do free registration, buy or enroll package and add their own portfolio. They will also have advanced QR code builder to build customized QR Code. Admin or the website owner can earn money easily creating packages for the users.
This system was made using the popular Laravel php framework. Strong security was maintained during the development and there is no sql injection, xss attack, csrf attack possible.
Features
Profile Top has the following features.
Key Features
- Laravel 10 is used as a php framework
- Bootstrap 5 is used in design
- One click installation.
- User friendly codes and easy to navigate
- Eye-catching and fully responsive design
- Strong security of codes
- Search user by designation, skill or custom name
- Subscription verify with email
- Membership system
- RTL Supported
- Theme Color change option
- Language change option
- Social Login (facebook, google)
Admin Features
- SEO Settings for all pages
- SMTP server mail
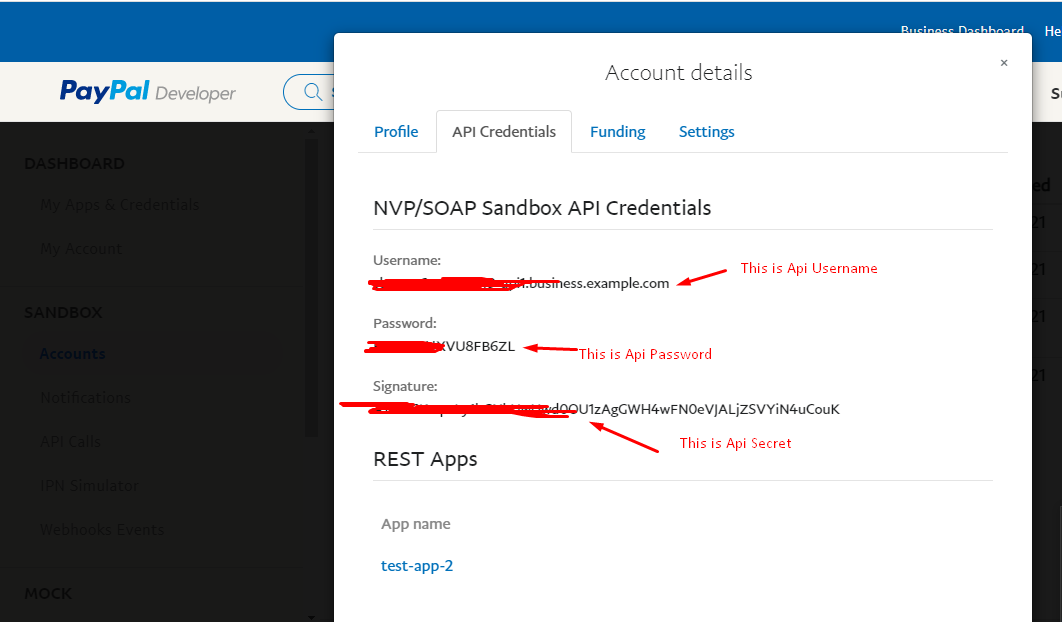
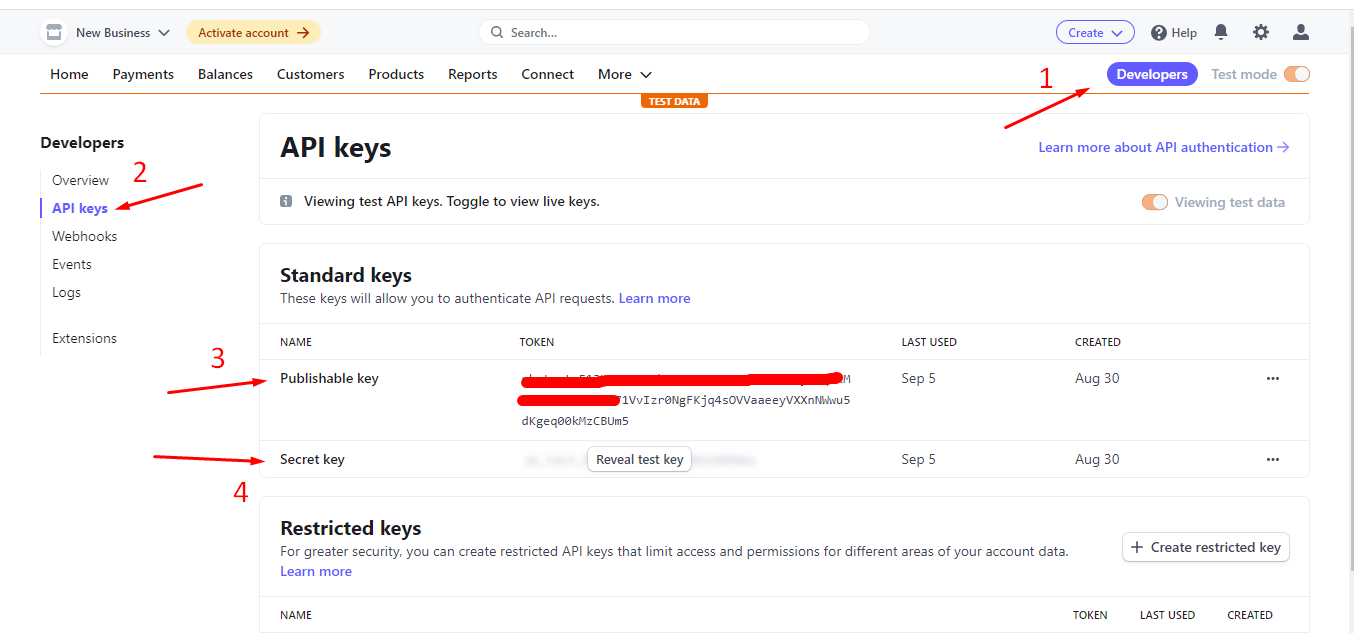
- Payment setting for PayPal, Stripe, Razorpay, Instamojo, Paystack, Mollie, Flutterwave, Paymongo and Bank
- Email configuration and template setting
- Cookie Consent option
- Google Recaptcha option
- Google Analytic option
- Tawk Live Chat option
- Social Login (facebook, google)
- RTL Supported
- Manage HTTP request Error Page
- Dynamic Pagination option
- Multi admin creation possible
- All Banner images change option
- Clear database option to start the website as fresh installation
- Order view and delete by admin
- Manage Theme Color
- Manage all user by admin
- Membership plan create, edit and delete option
- Testimonial create, edit and delete option
- Service create, edit and delete option
- FAQ create, edit and delete option
- About Page information edit option
- Terms and Privacy Policy Page information edit option
- Custom dynamic pages create, edit and delete option
- Language change option for front end and back end with RTL Support
- Home page sections manage with on/off option
- Subscriber manage with email to subscribers option
- Profile information, photo, password change option
- Forget and reset password option
- Blog Category create, edit and delete option
- Blog create, edit and delete option
- Manage Blog Comments and reply option
- Package based manage user features
User Features
- Login with facebook and google
- User registration system with email verification
- User Login, forget and reset password option
- Profile information, photo, password change option
- Purchase Package and payment with stripe, paypal, Razorpay, Instamojo, Paystack, Mollie, Flutterwave, Paymongo and bank
- See orders and details.
- Advanced QR Code Builder
- Social Media share option for blog post
- Unique username generate
- Manage Theme Color
- Manage SEO Setting
- User can manage own language system for his profile with RTL support
- 3 Profile template
- Hide/Show any section
- About, Bio, Experiences, Skills, Services, Jobs, Educations, Portfilios, Testimonials, Blogs and Social Media Links etc management
- RTL Supported
Installation
The installation of this script is super easy. If you can install normal php based scripts on your server, you can install our script. We will tell you how to install this script step by step on a server.
If you extract the zip file, you will find a total of three folders and one file.

The folder names are: 'all version,' 'documentation,' and 'main_files'. The 'main_files' folder contains the main Laravel source code and 'database.sql' is the main database file.
Creating Database using Cpanel
1. Login to your hosting's cpanel using the login information. You will see an interface like this:

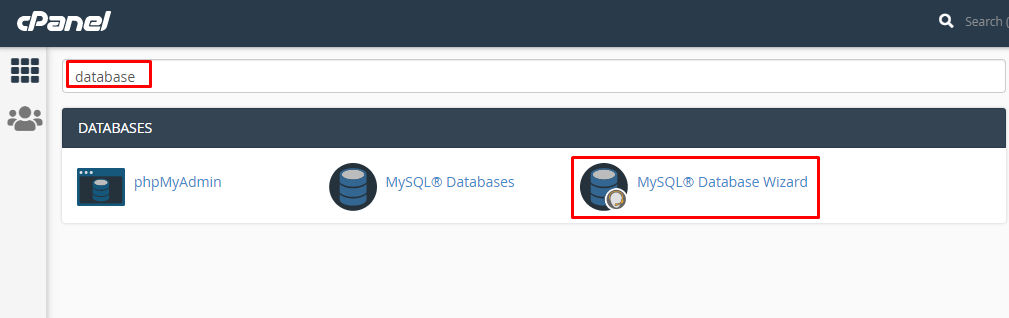
2. You will get a search section in the cpanel. Search there by writing the word "database". You will get some options. Click on "MySQL® Database Wizard" option.
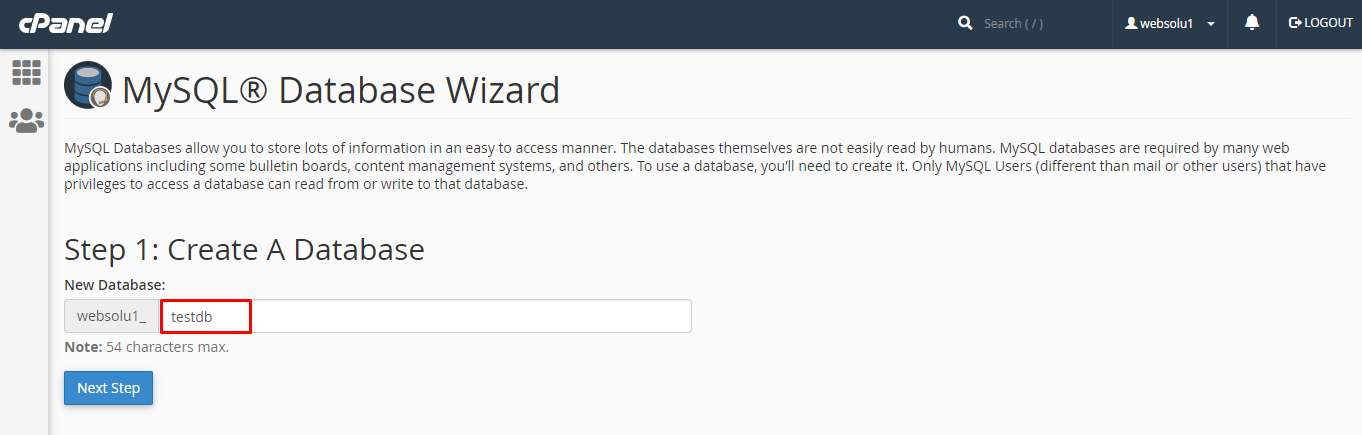
3. Then in Step 1, you will have to create a database. In the text field, give your database name and click on next step.
4. Then in Step 2, you will have to create a database user. Give your username and passwords here. Then click on "Create User" button.

5. Now a permission page will come. Just check the tick mark on "ALL PRIVILEGES" and you will see all the options will be automatically checked.

6. Click on the "Next Step" button in the bottom.

Uploading Files using Cpanel
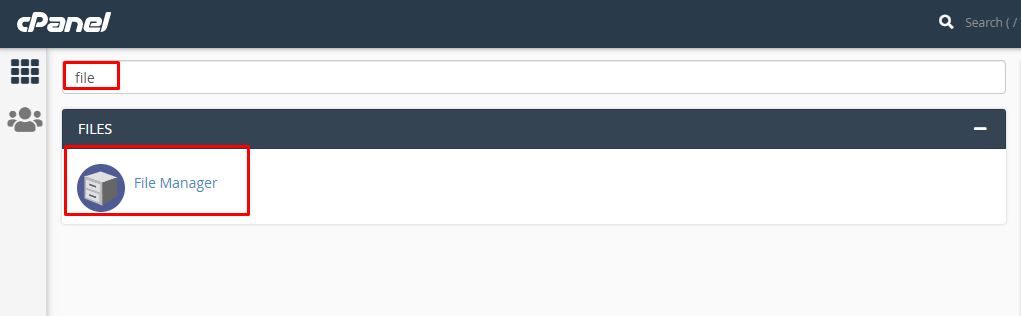
1. In the search field of your cpanel, write the word "file". You will get a "File Manager" option. Click on that option.
2. Search for the "public_html" and go into there.

3. Now go to the folders that you got after extracting the main zip and compress the folder "main_files" using any software like winrar.

4. The zip file will be like this.

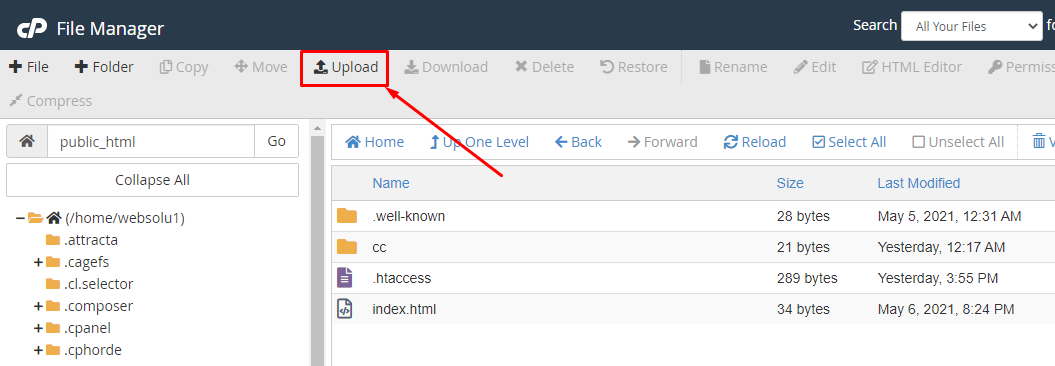
5. In the cpanel's "public_html", upload this zip file.
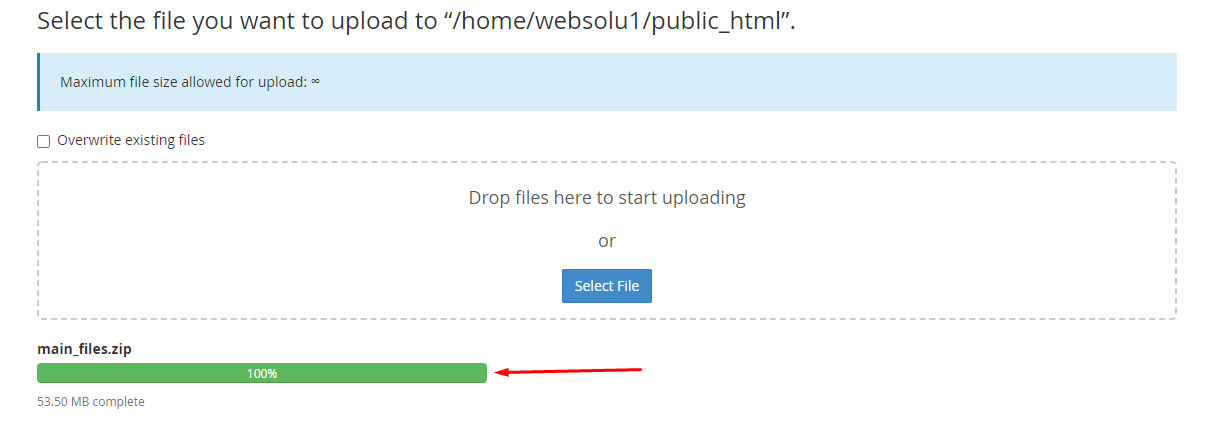
6. You will get an interface like this.

7. Drag and drop the zip file here or just click on the "Select File" and select the file from your computer. You will see a progress of uploading file. Wait until it is finished.

8. After finishing the upload, you will see a green bar. It indicates that upload is successful.
9. Now close the upload window. In the public_html section, press on "Go" button to refresh the page. Then you will see the zip file in the right side.

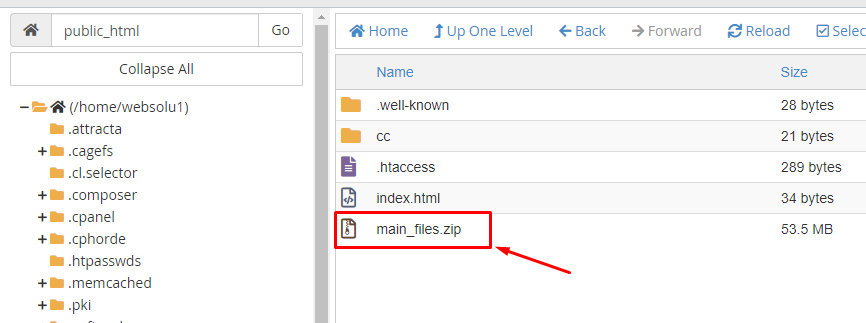
10. Do right click on that file and select "Extract" option.
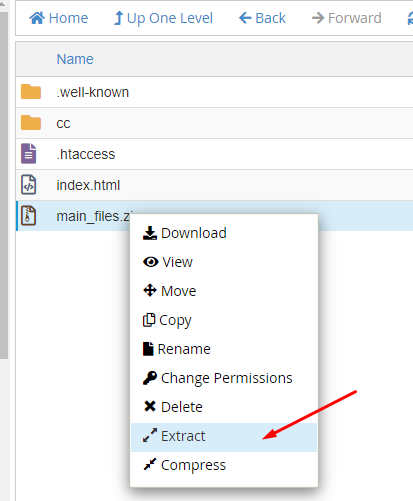
11. Press on "Extract Files" button.

12. It will take only a few minutes. After finish, you will get a window like this.
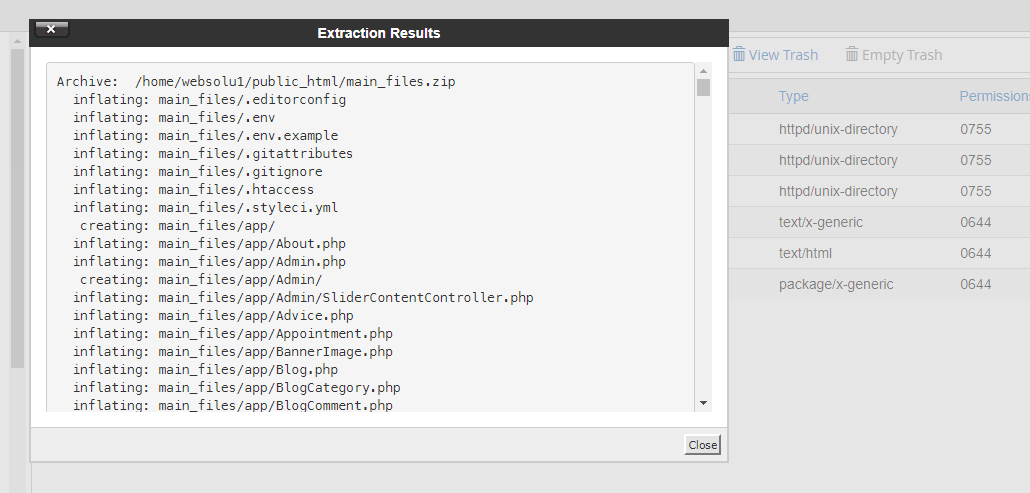
13. Just close this window. Then double click on the "main_files" folder and go into there.

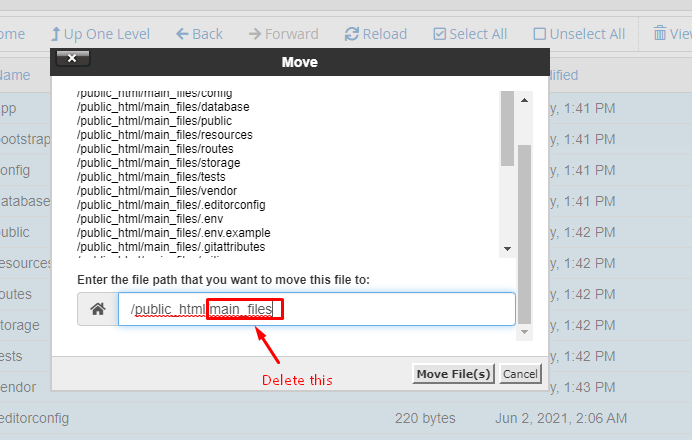
14. Now click on the "Select All" from top section.

15. Click on the "Move" option.

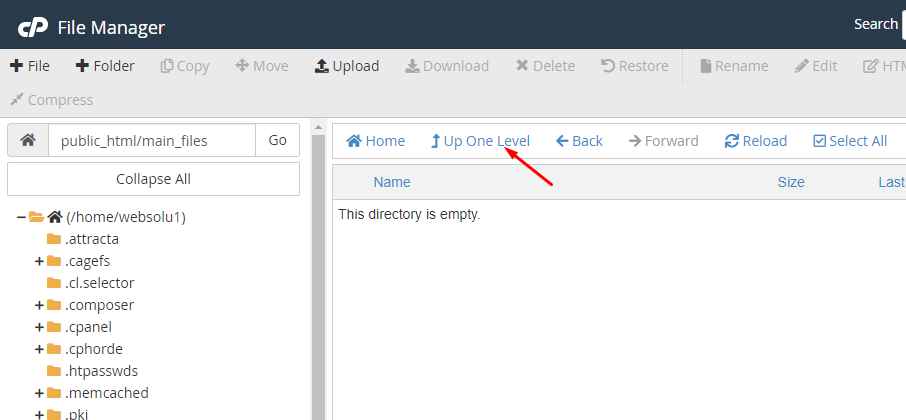
16. Delete the "main_files" from the box. Only keep this "/public_html/". Then click on "Move Files".
17. Now, click on "Up One Level".
Uploading Files using FTP
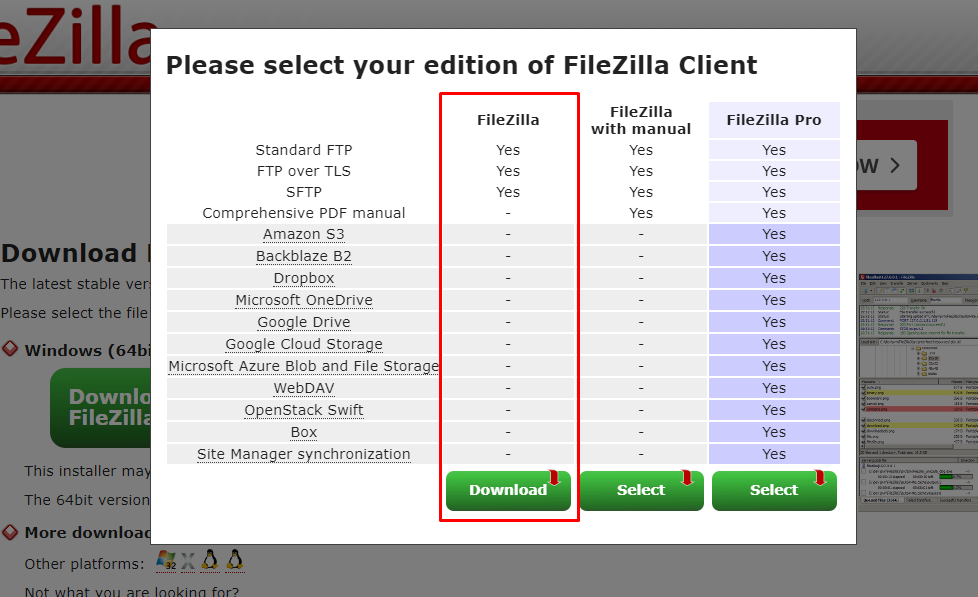
1. Download any FTP client on your computer like "FileZilla". Search on Google by "FileZilla" or go to
their website to download:
https://filezilla-project.org/
2. Use the first option to download
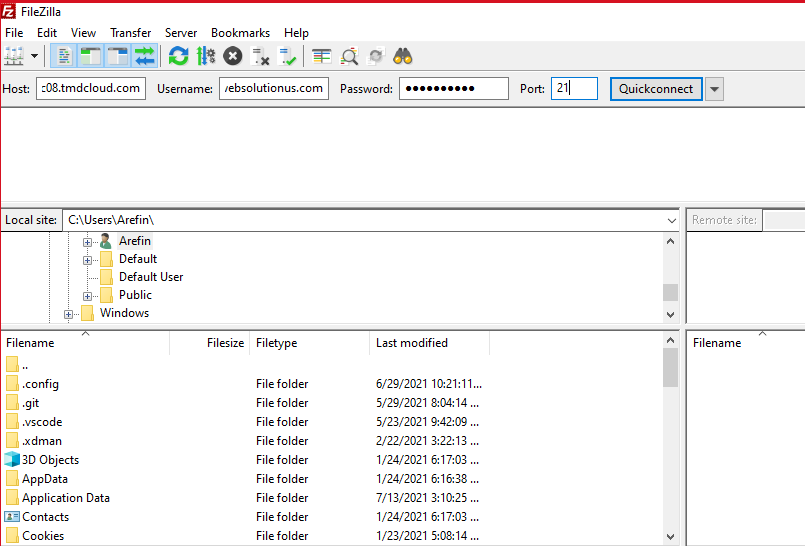
3. After download, install it and open. The interface will be like this:

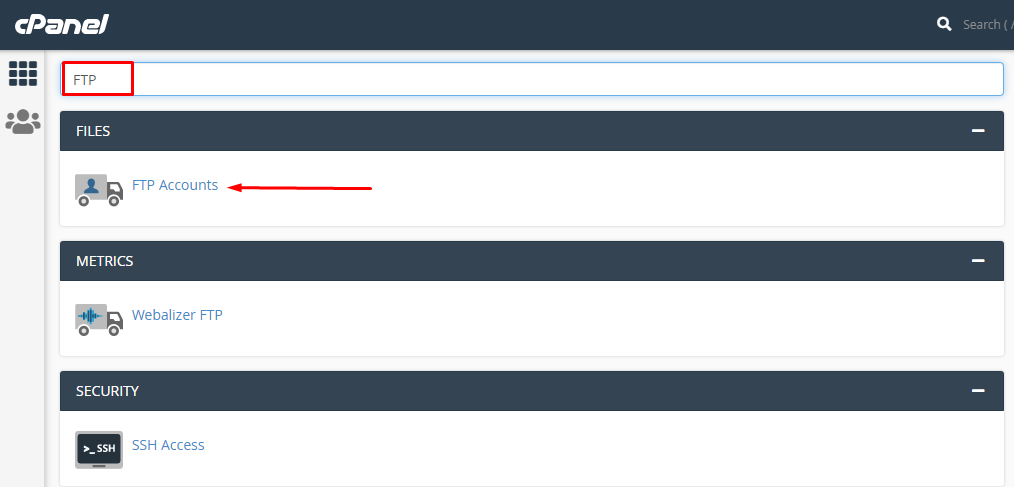
4. You can collect your FTP information contacting your hosting provider. Or, going to cpanel, you can create your FTP. In cpanel, search for "FTP".
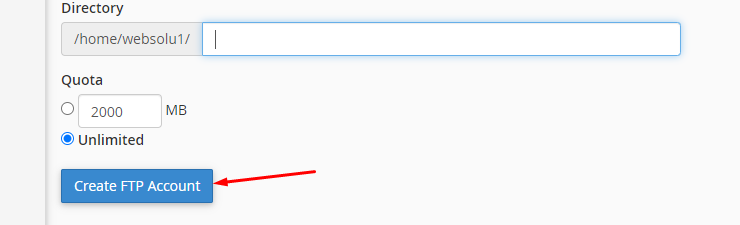
5. Put ftp username, password in the form. Become sure, you delete the marked box data in the following image.

6. Click on "Create FTP Account" button.
7. Your FTP information will be like this:
FTP Host: {your hosting provider will give you host
name}
FTP Port: 21
FTP Username: testftp@websolutionus.com
FTP Password: {that you gave
while creating the FTP}
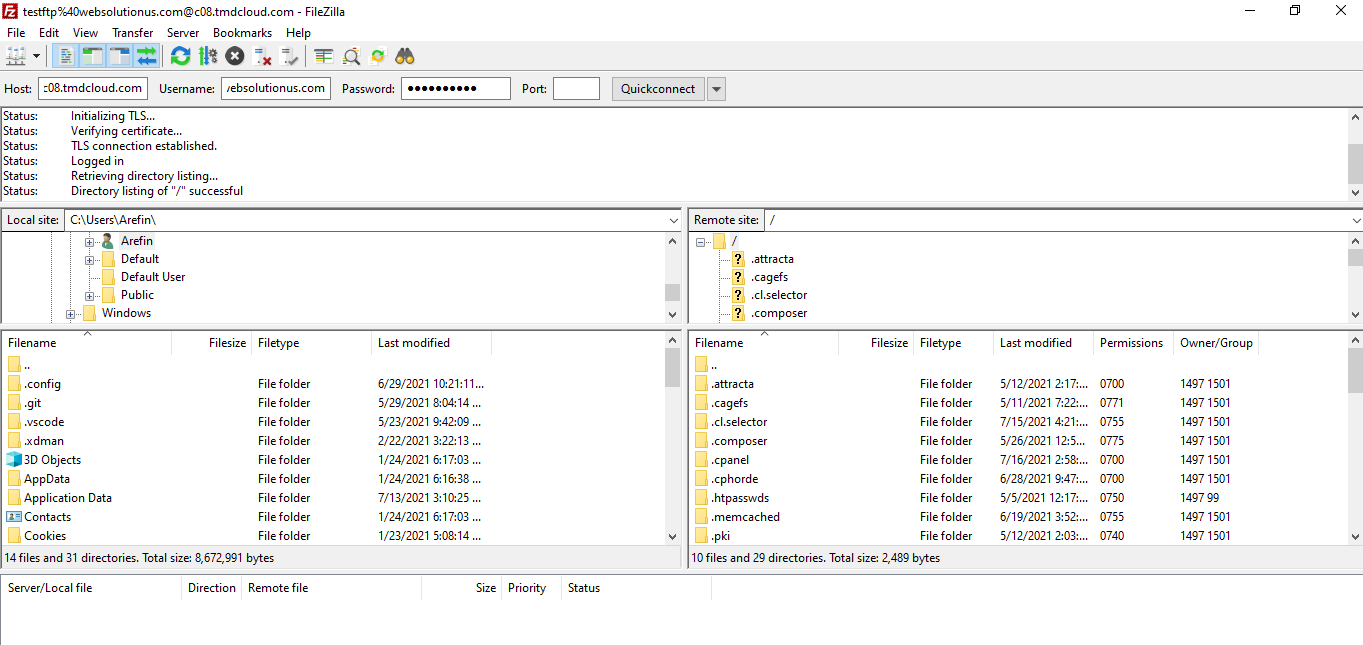
8. Now in filezilla put those information and click on "Quickconnect" button.
9. If connection is successful, you will get an interface like this:
10. Now in the left side box, go to the location where you have extracted the script's file. And in the right side, go to public_html.
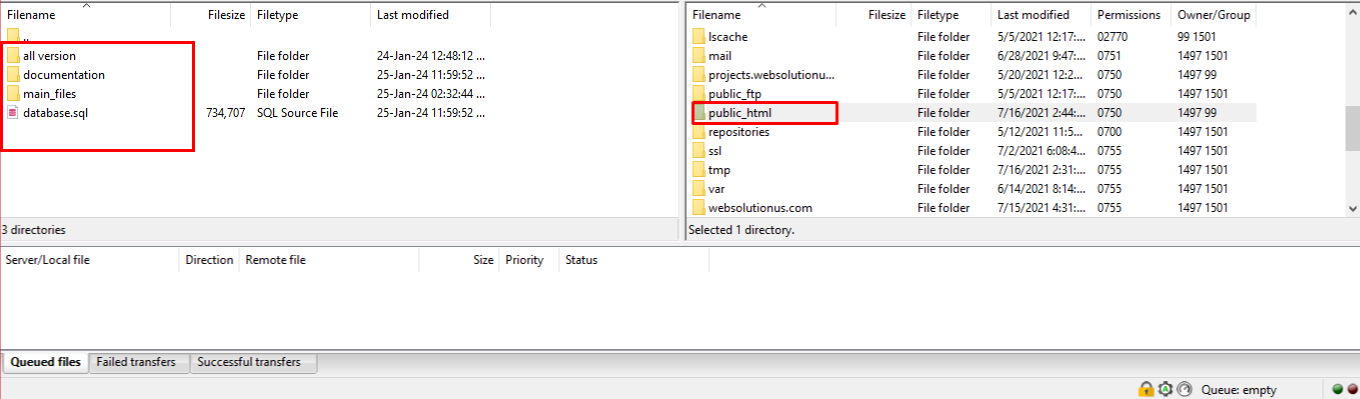
11. Then right click on the "main_files" from left side box and click on "Upload". All the files then will be uploaded into the "public_html" of the right side.

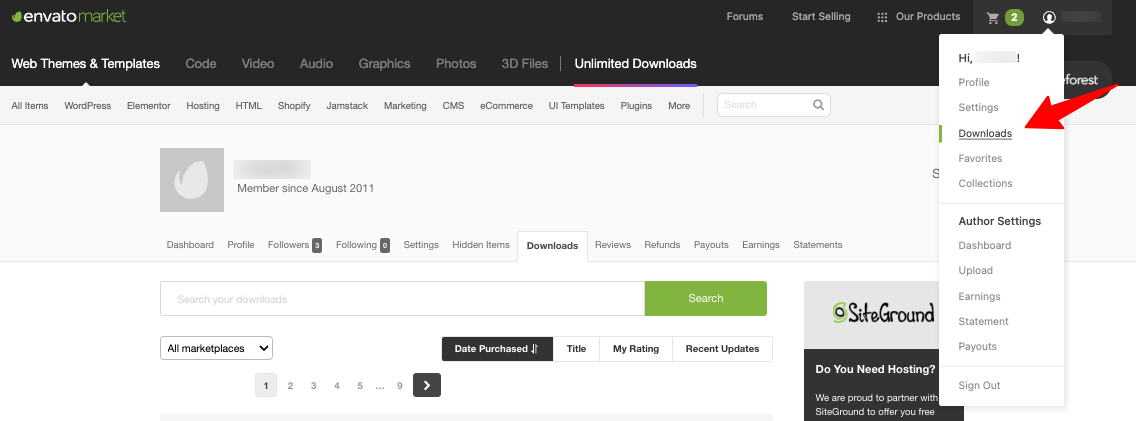
How to find your purchase code
1. Log into your Envato Market account. - Click here go envato marget
2. Hover the mouse over your username at the top of the screen..
3. Click ‘Downloads’ from the drop-down menu..
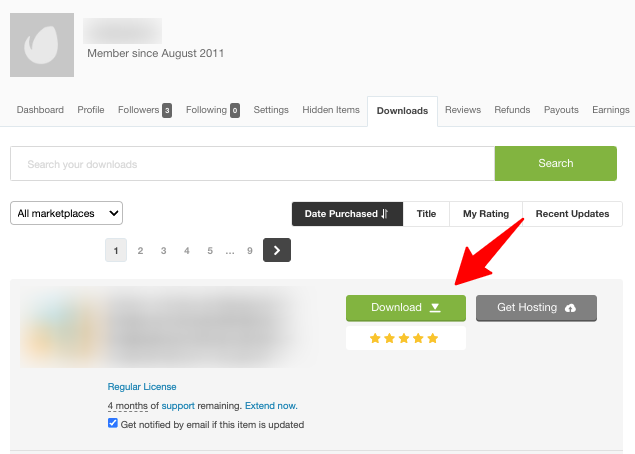
4. Click 'Download' next to the item for which you need the purchase code.
5. Click ‘License certificate & purchase code’ (available as PDF or text file).
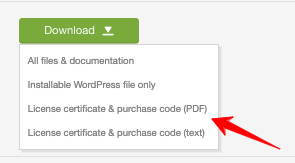
6. Here is an example of a PDF License certificate and purchase code:

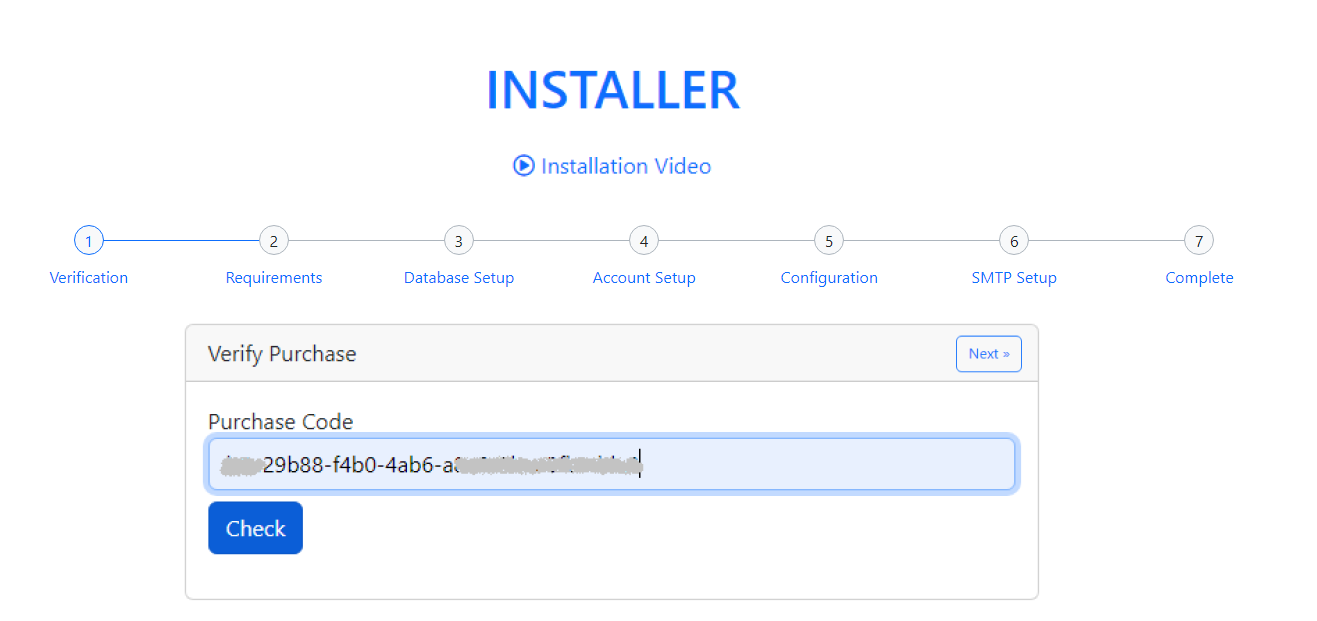
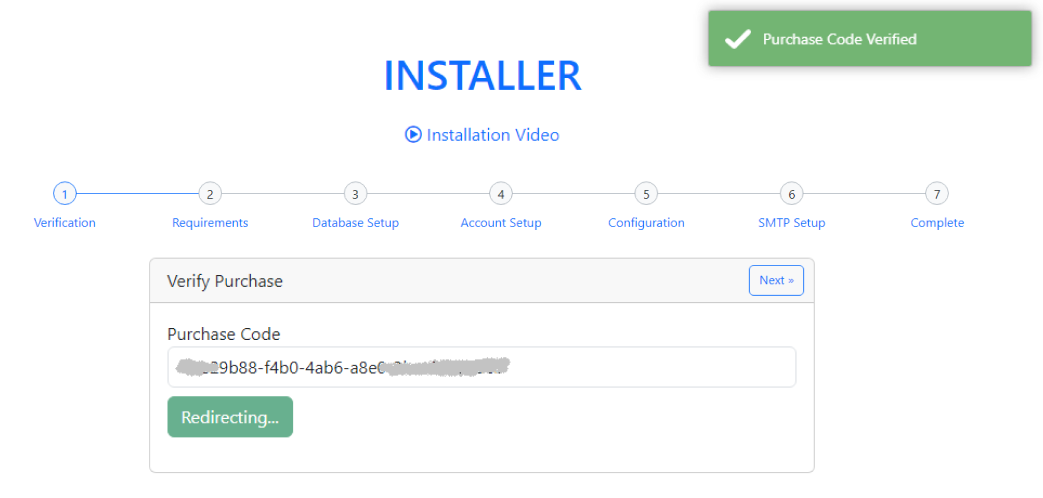
Verify Your Purchase code
1. Now go to your website "http://your_domain.com".
2. Enter your purchase code here and press the check button to verify it.
3.Ensure that your server meets the following criteria. Press the 'Next' button to proceed to the next step.


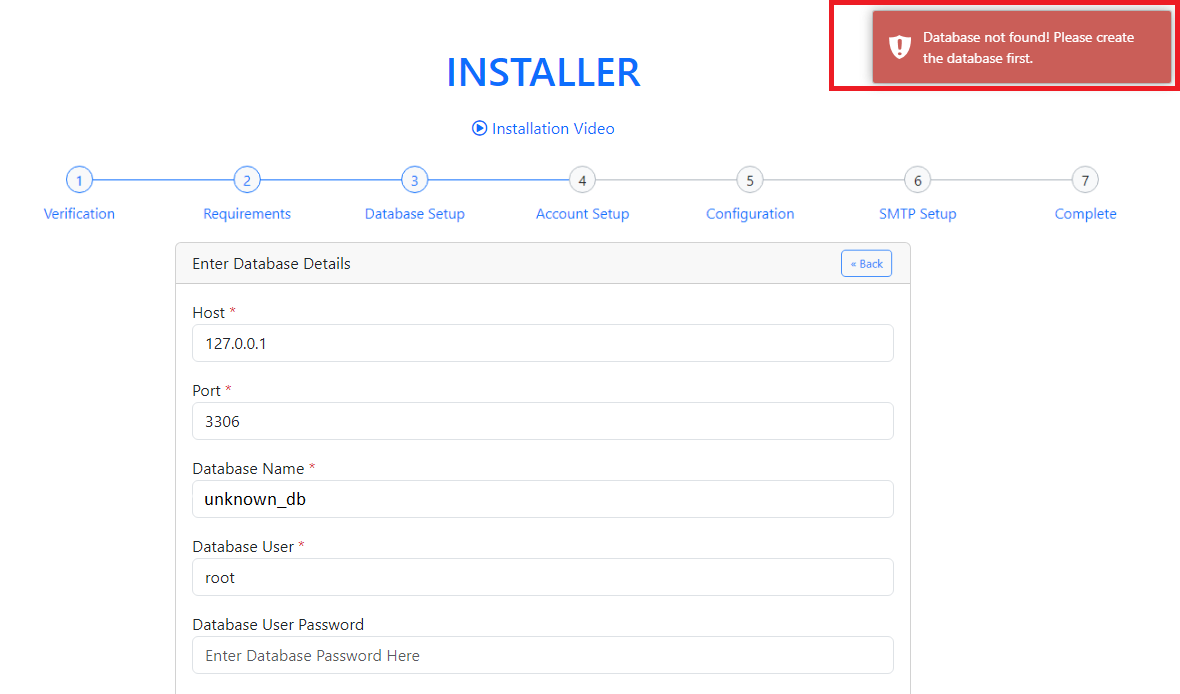
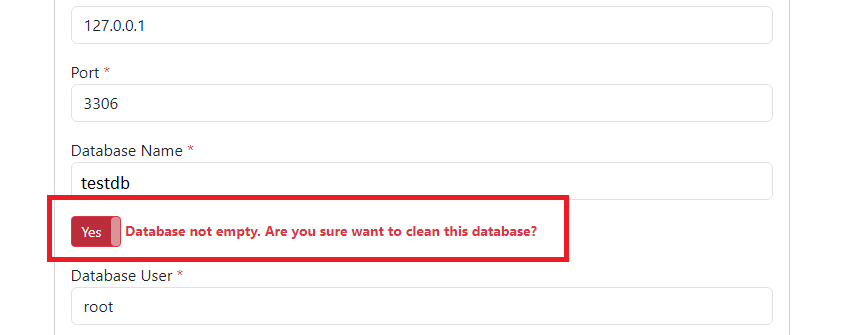
4. Setup Your Database from here. Press the 'Setup Database' button to proceed to the next step.


5. Fill Up all information and create an Admin Account. Press the 'Create Account' button to proceed to the next step.

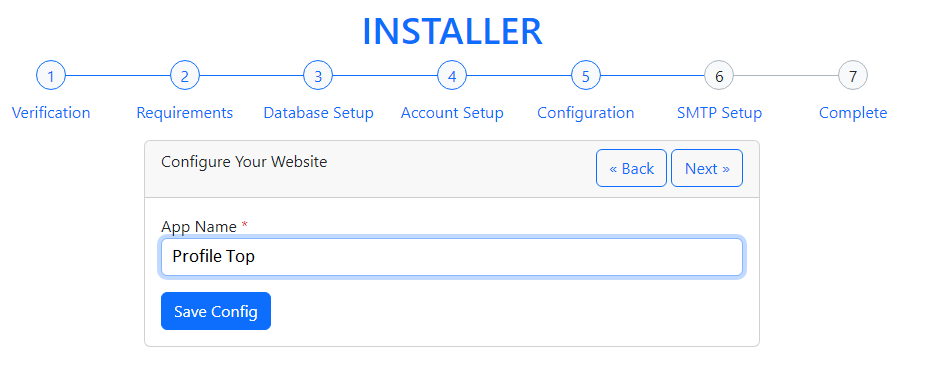
6. Setup App Name. Press the 'Save Config' button to proceed to the next step.
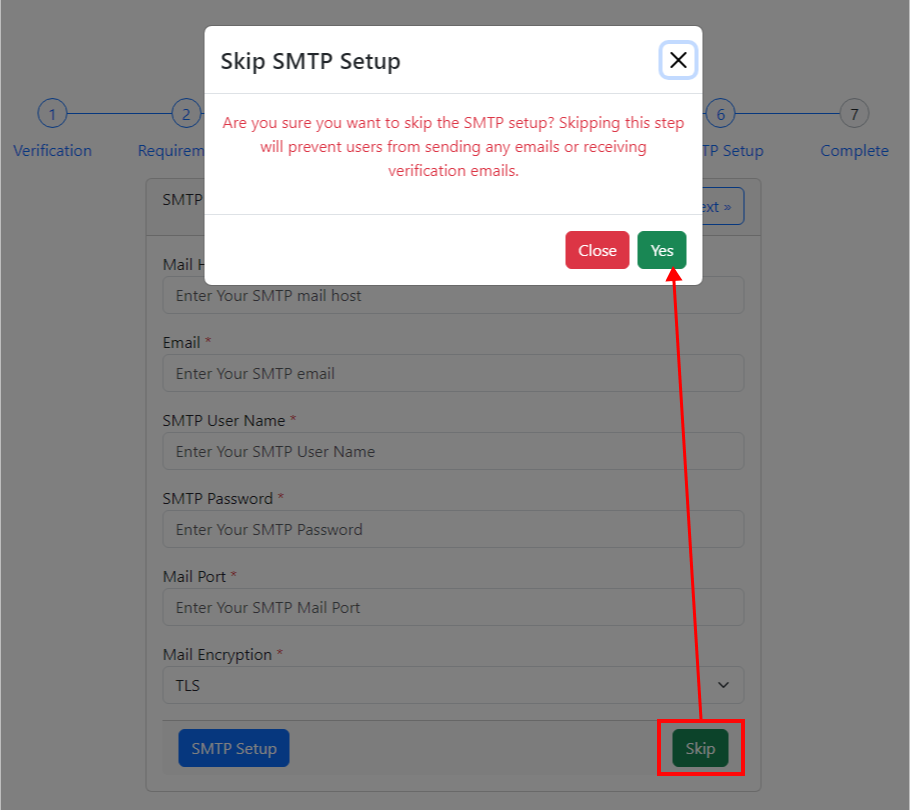
7.1 Setup Mail SMTP.

7.2 OR You can skip Mail SMTP.
8. Setup complete. Press 'View Dashboard' to go to the admin dashboard or 'View Website' to go to the website.

Your task is done and you can use our script without any problem. :)
Requirements
You will need to make sure your server meets the following requirements:
- Requires PHP 8.1.0 or later
- BCMath PHP Extension
- Ctype PHP Extension
- Fileinfo PHP extension
- JSON PHP Extension
- Mbstring PHP Extension
- OpenSSL PHP Extension
- PDO PHP Extension
- Tokenizer PHP Extension
- XML PHP Extension
Credentials
The default credentials of the script are:
Admin Login
URL: https://www.yourwebsite.com/admin
Login Email: admin@gmail.com
Login Password: 1234
User Login
URL: https://www.yourwebsite.com/login
Login Email: user@gmail.com
Login Password: 1234
General Settings
Website General Setting can be set up from the admin panel. Go to "Setting > General Setting". See:

Logo and Favicon
Logo and favicon can be set up from the admin panel. Go to "Setting > Logo Setting". See:
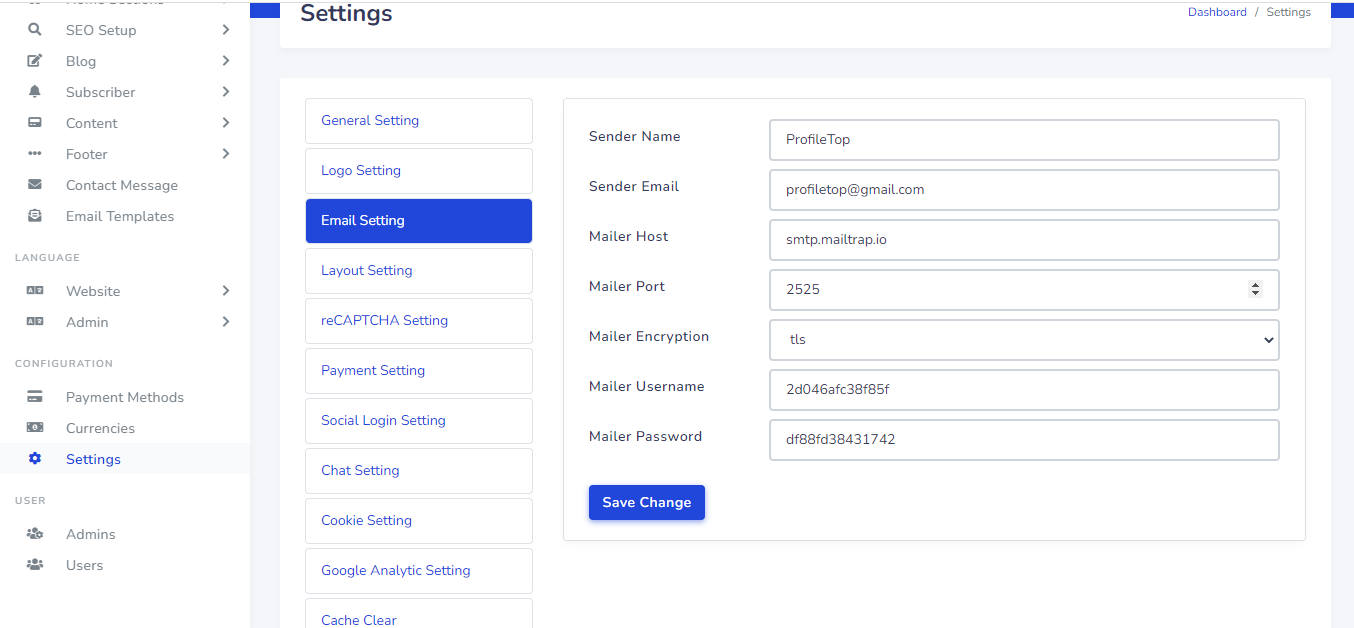
Email Setup
SMTP Email can be set up from the admin panel. Go to "Setting > Email Setting". See:
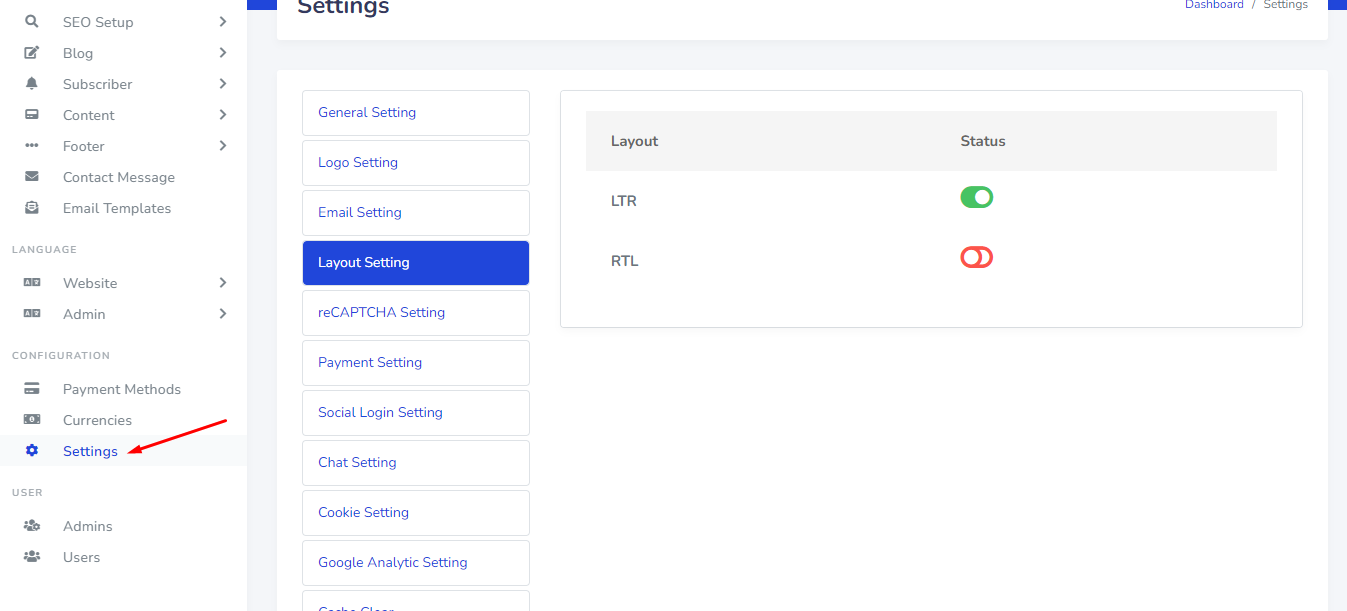
Layout Setting
Website Layout can be set up from the admin panel. Go to "Setting > Layout Setting". See:
Google Recaptcha
Google Recaptcha can be set up from the admin panel. Go to "Setting > Recaptcha Setting". See:
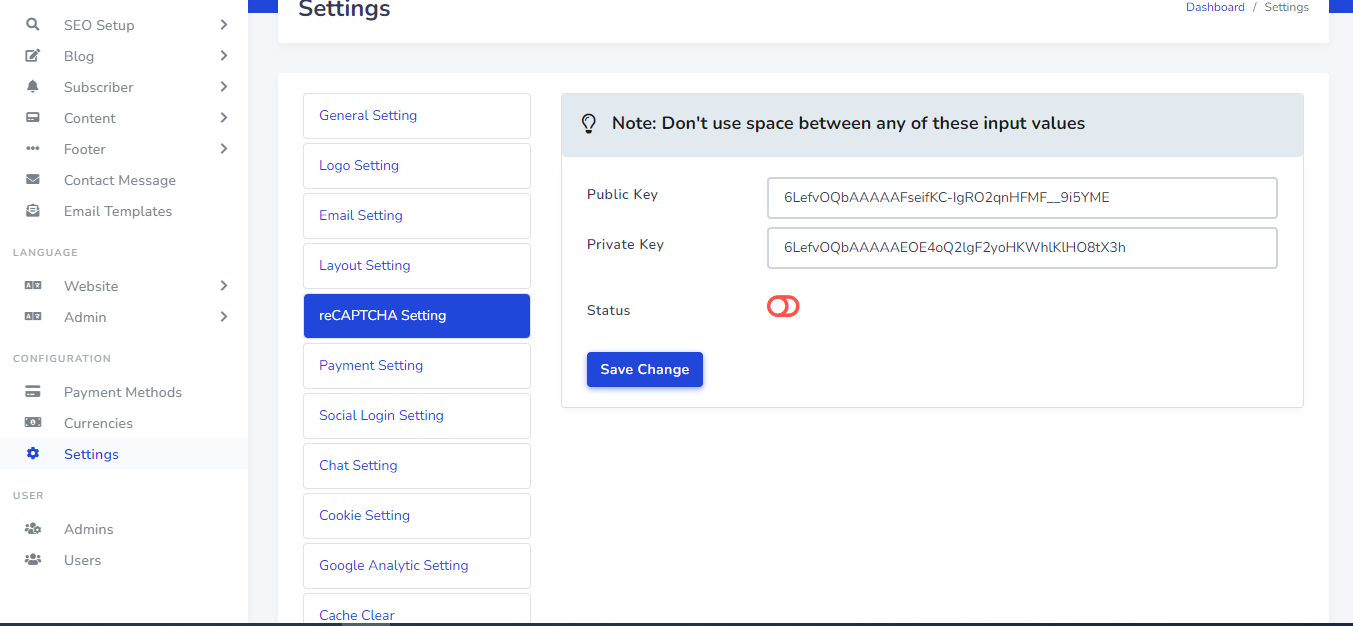
To get your recaptcha keys, go to this link:
https://www.google.com/recaptcha/admin/create
Select version 2.

Add your website's domain name or subdomain name here and after submit you will get a site key and secret key.
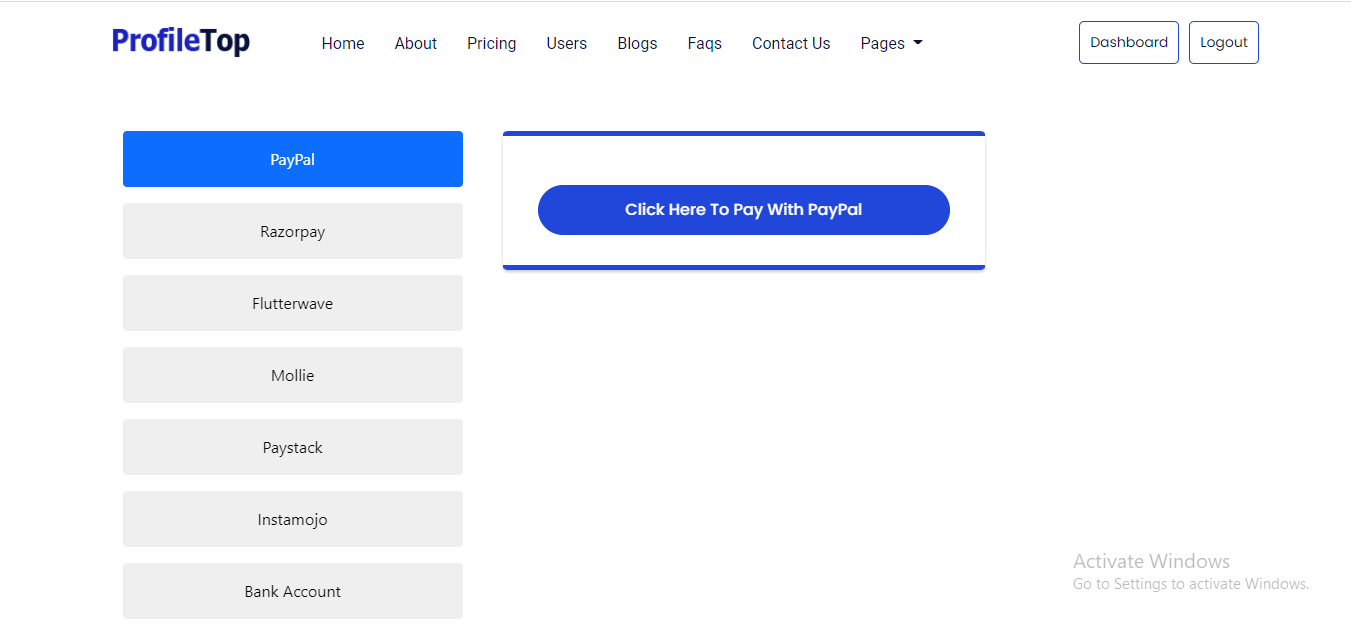
Payment Method
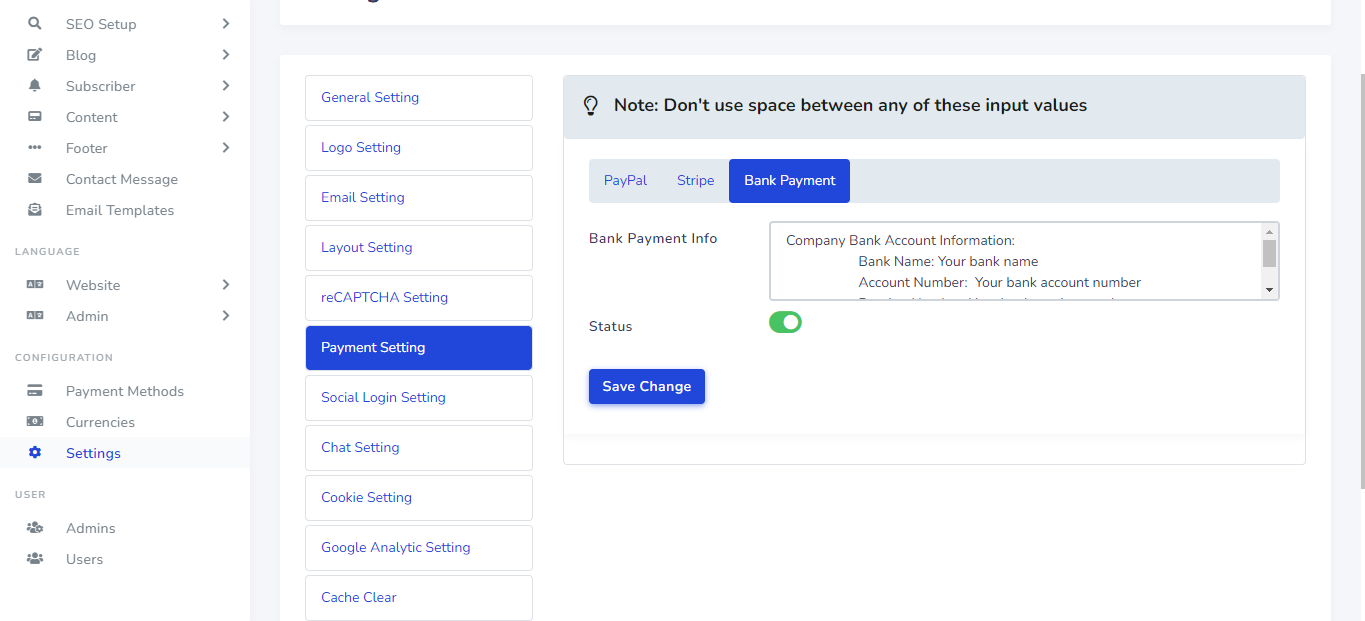
Payment Method can be set up from the admin panel. Go to "Setting > Payment Setting". See:


Payment Method Visibility
Payment Method Status can be set up from the admin panel. Go to "Payment Methods" from sidebar. See:

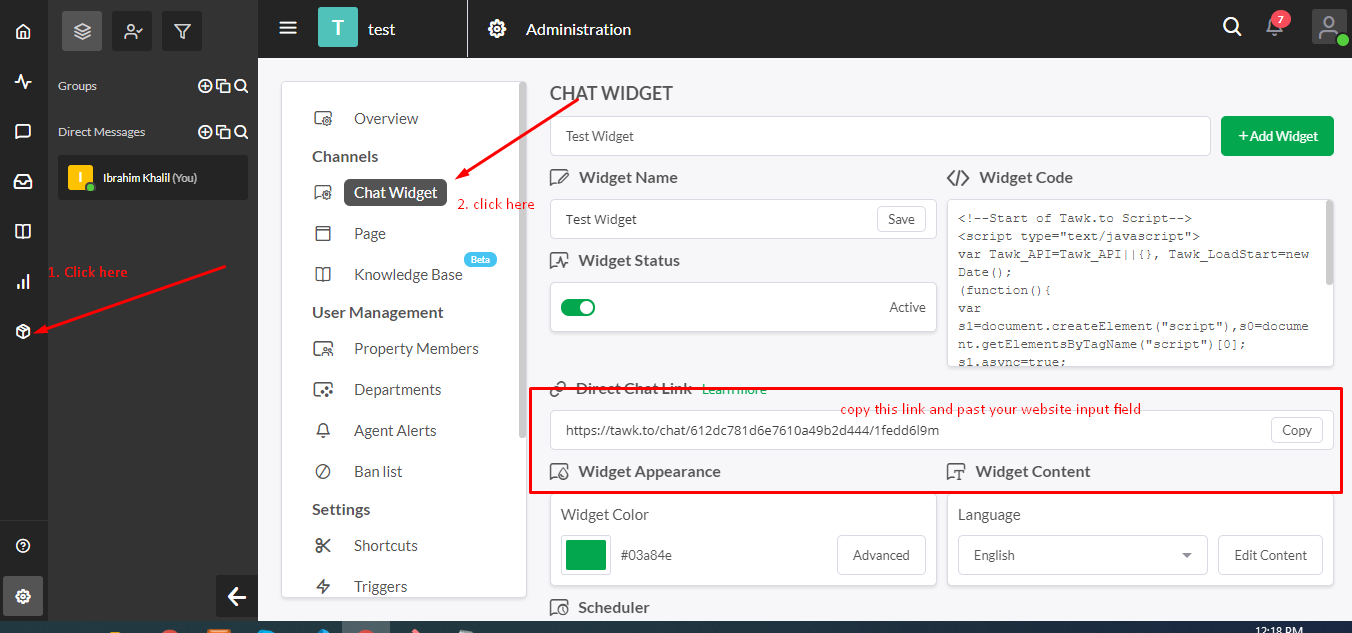
Tawk Live Chat
Tawk Live Chat can be set up from the admin panel. Go to "Setting > Chat Settings". See:

Cookie Consent Modal
Cookie consent modal can be set up from the admin panel. Go to "Setting > Cookie Setting". See:

Google Analytic Settings
Google Analytic can be set up from the admin panel. Go to "Setting > Google Analytic Setting". See:

Cache Clear
You can easily clear your website cache from the admin panel. Go to "Setting > Cache Clear". See:
Clear Database Settings
Clear Database setting can be set up from the admin panel. Go to "Setting > Clear Database". If you want to use the software from scratch, you have to select this option. You do not need to remove the existing data one by one. See:
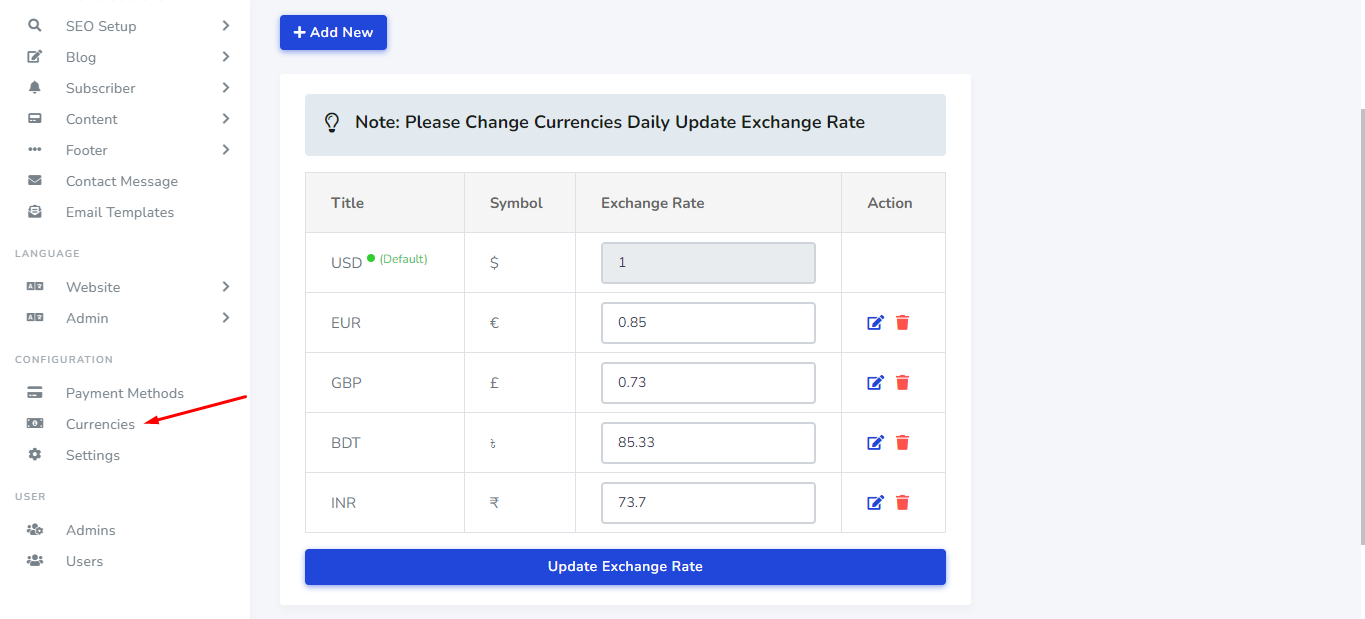
Currency Setup
Currency can be set up from the admin panel. Go to "Currencies" from sidebar. See:
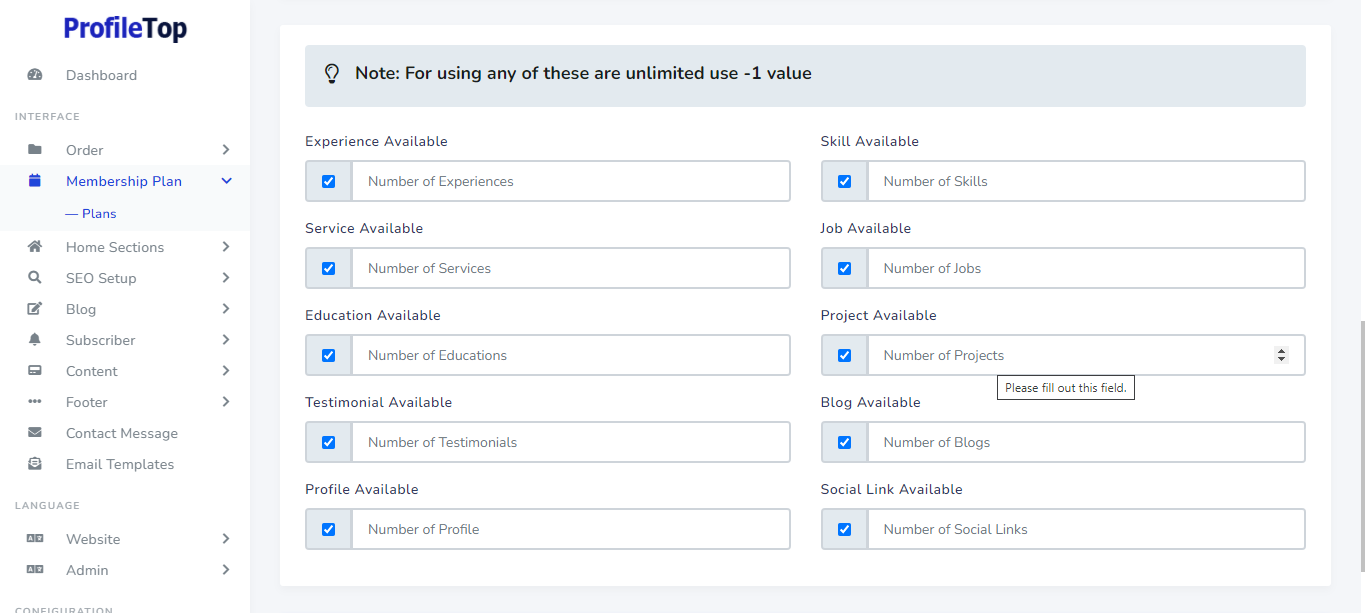
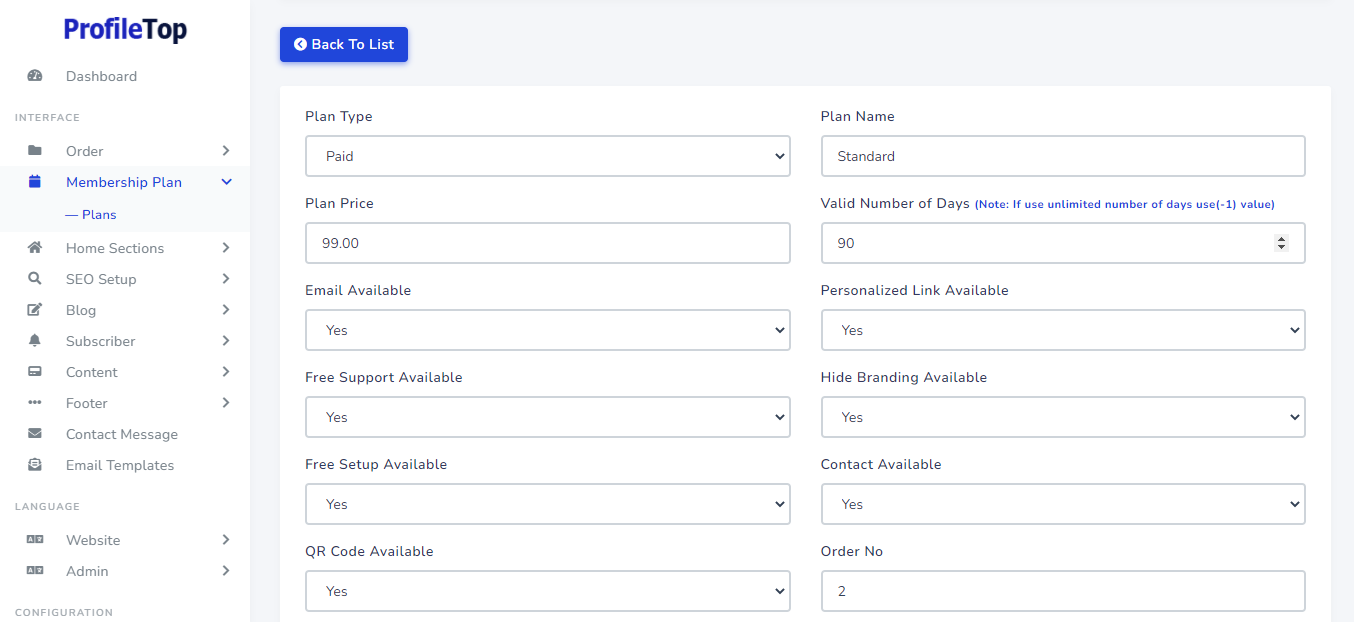
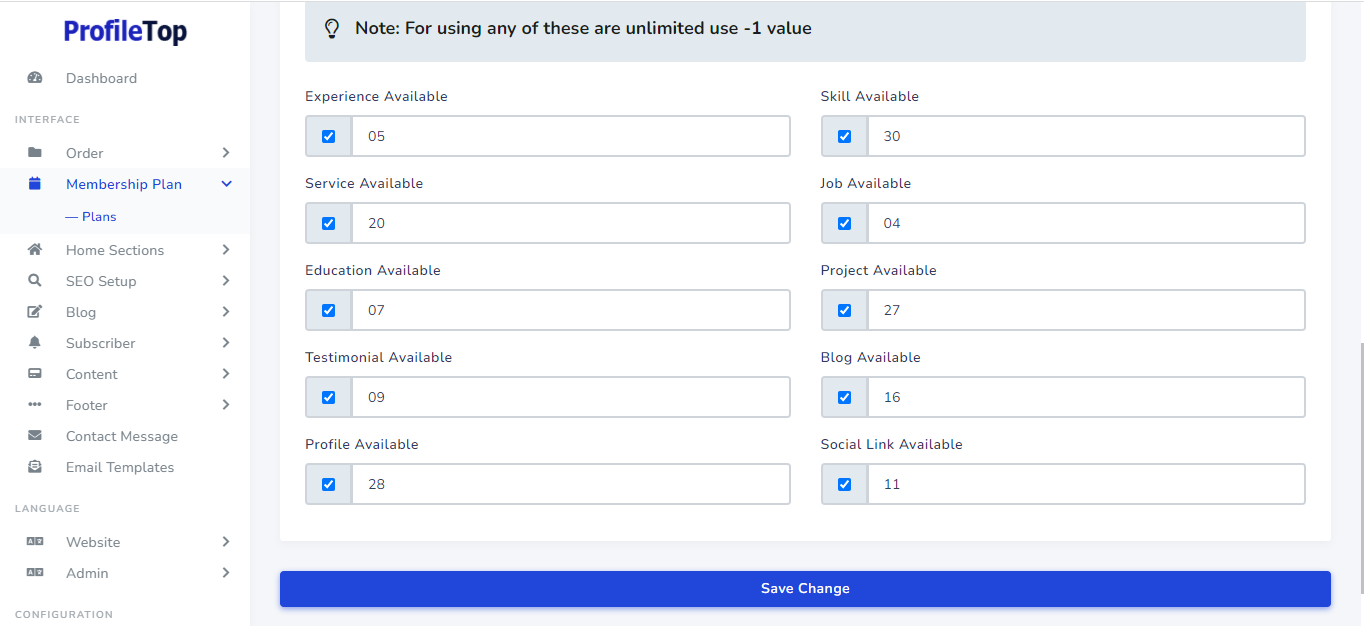
Membership plan
Membership plan can be manage from the admin panel. Go to "Membership plan > Plans". See:


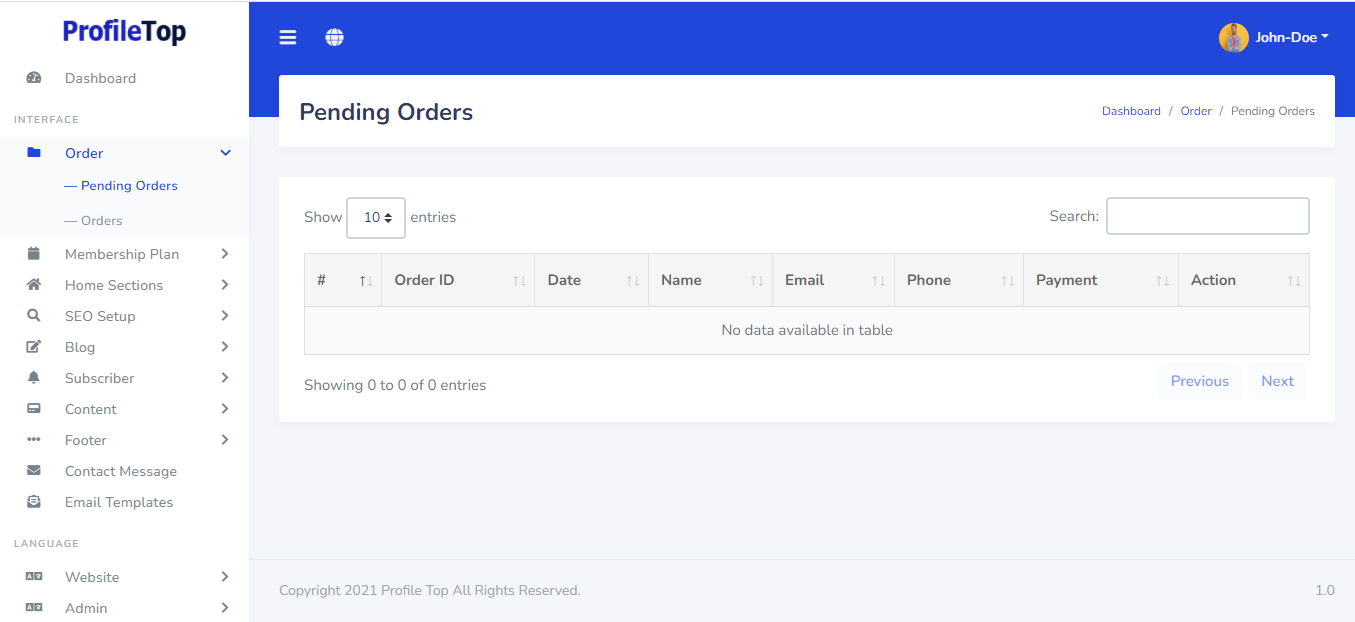
Orders
Order can be manage from the admin panel. Go to "Order > Pending Orders" or "Order > Orders". See:


Users
Users can be manage from the admin panel. Go to "User" from sidebar. See:


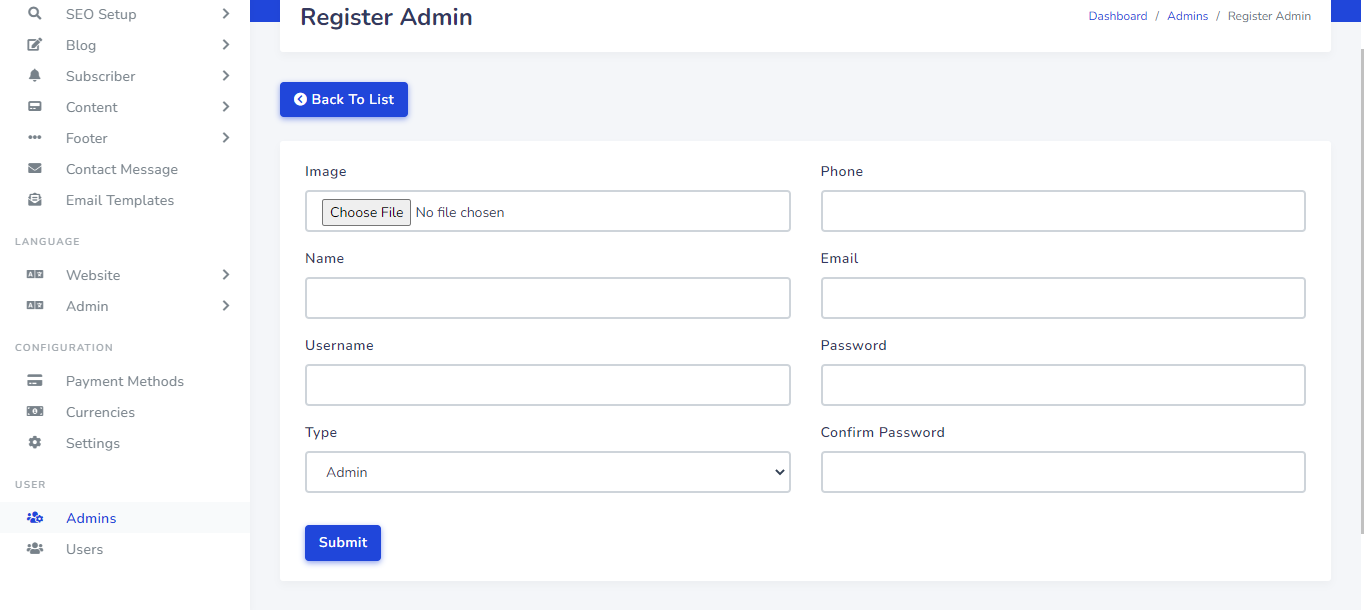
Admin
The main Admin can add more admins into the system. Other admins can not delete the main admin. But the main admin can delete other created admins in this system. Go to "Admin" from sidebar. See:

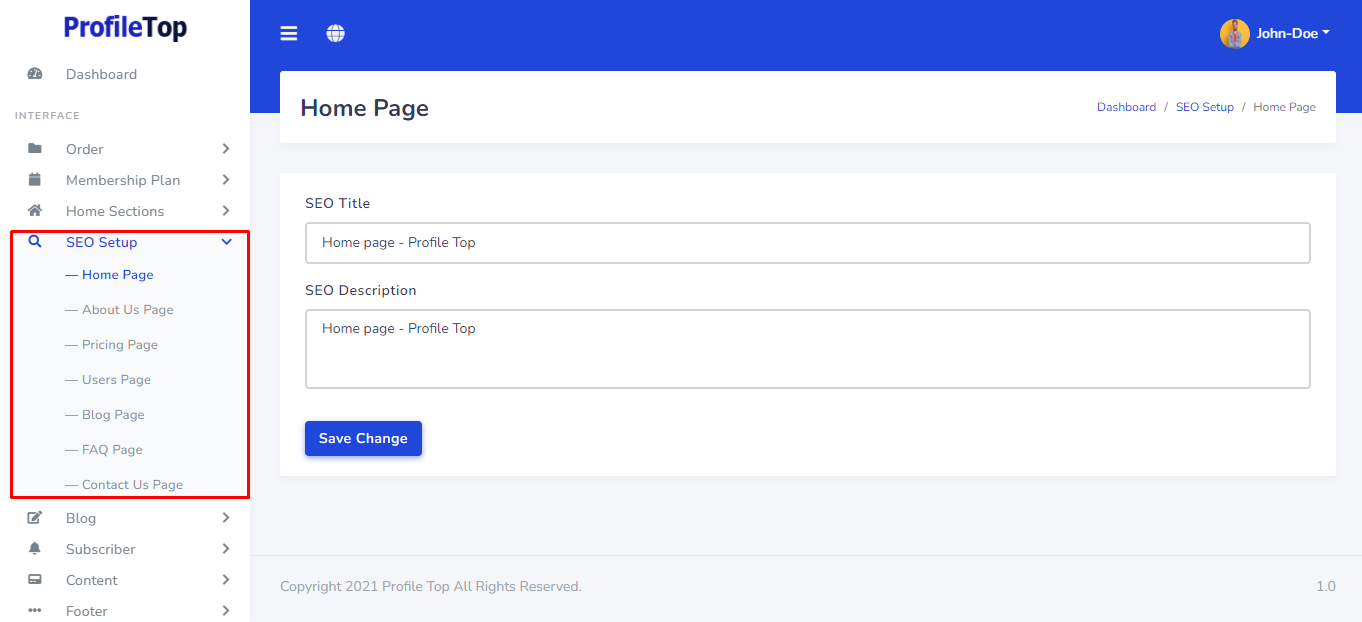
SEO Setup
SEO setting can be setup from the admin panel. Go to "SEO Setup" from sidebar. See:
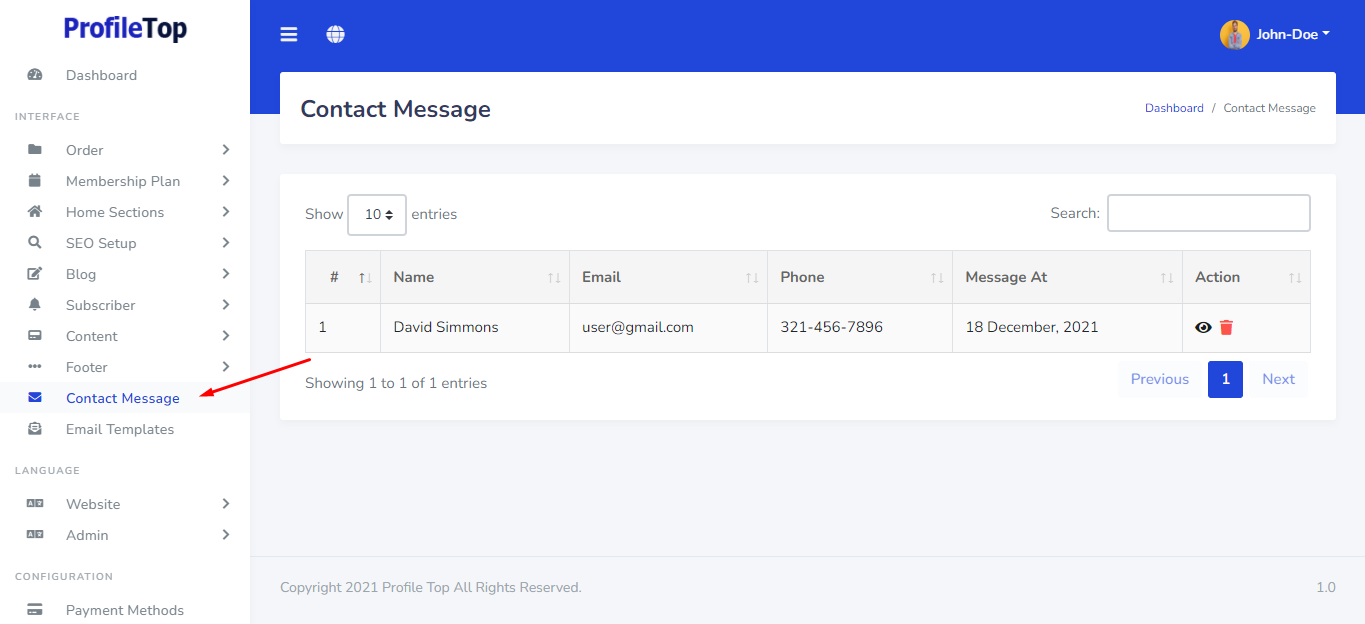
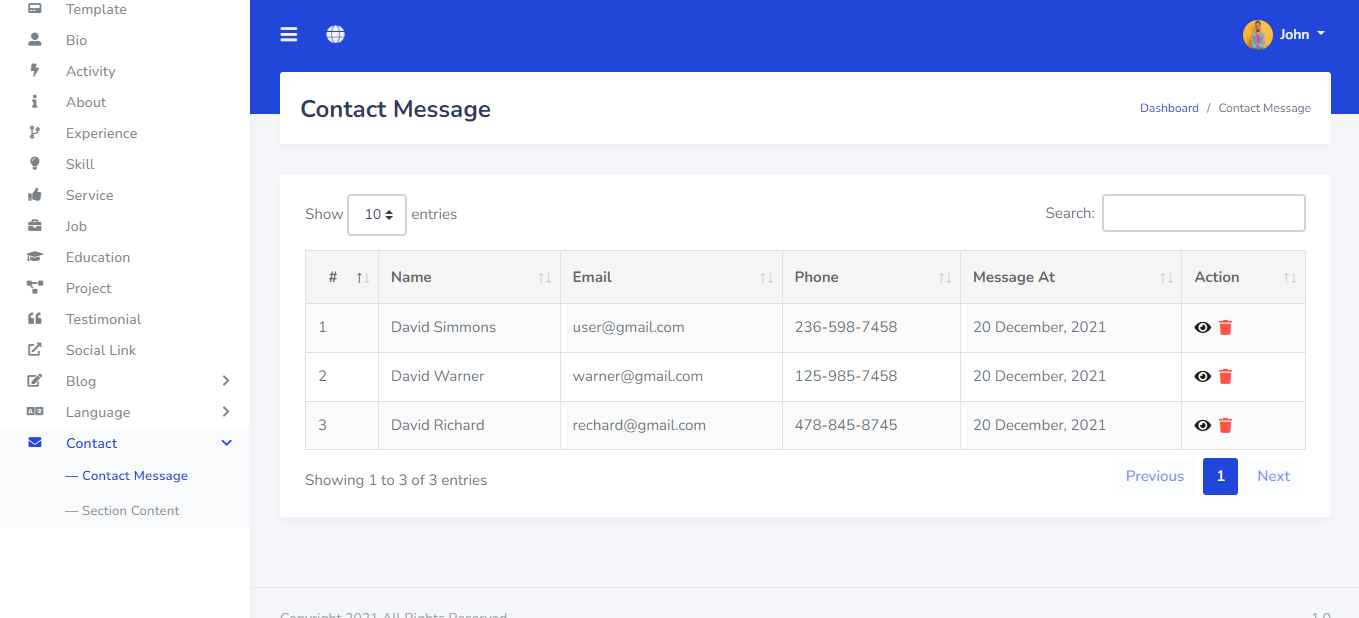
Contact Message
Contact Message can be manage from the admin panel. Go to "Contact Message from sidebar. See:

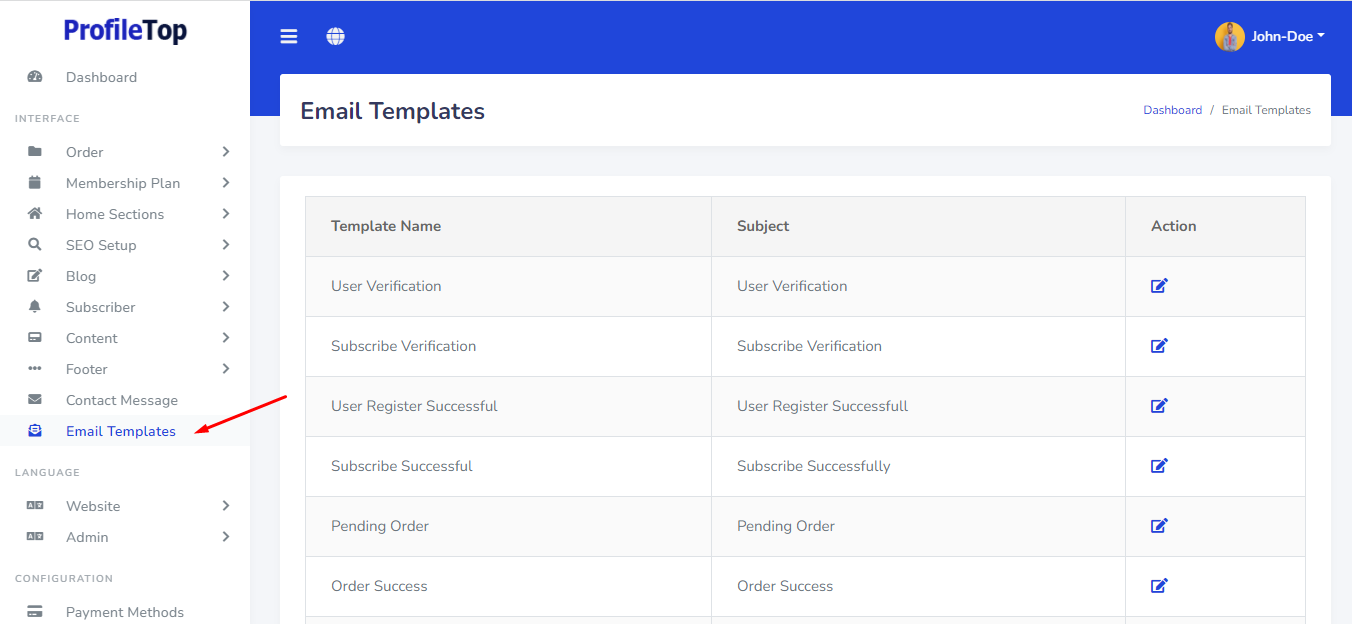
Email Template Settings
Email Templates can be set up from the admin panel to send email in your preferred format. Go to "Email Templates" from sidebar.See:

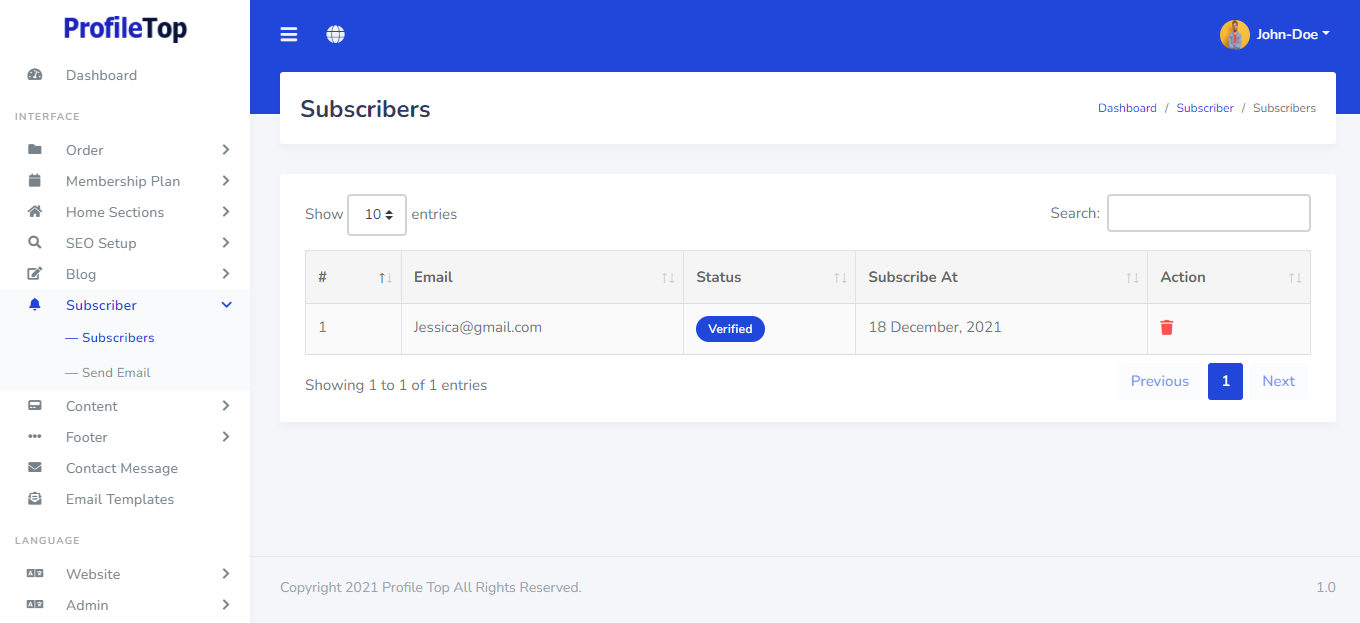
Subscriber
Subscription email can be manage and send mail from the admin panel. Go to "Subscriber > Subscribers".See:

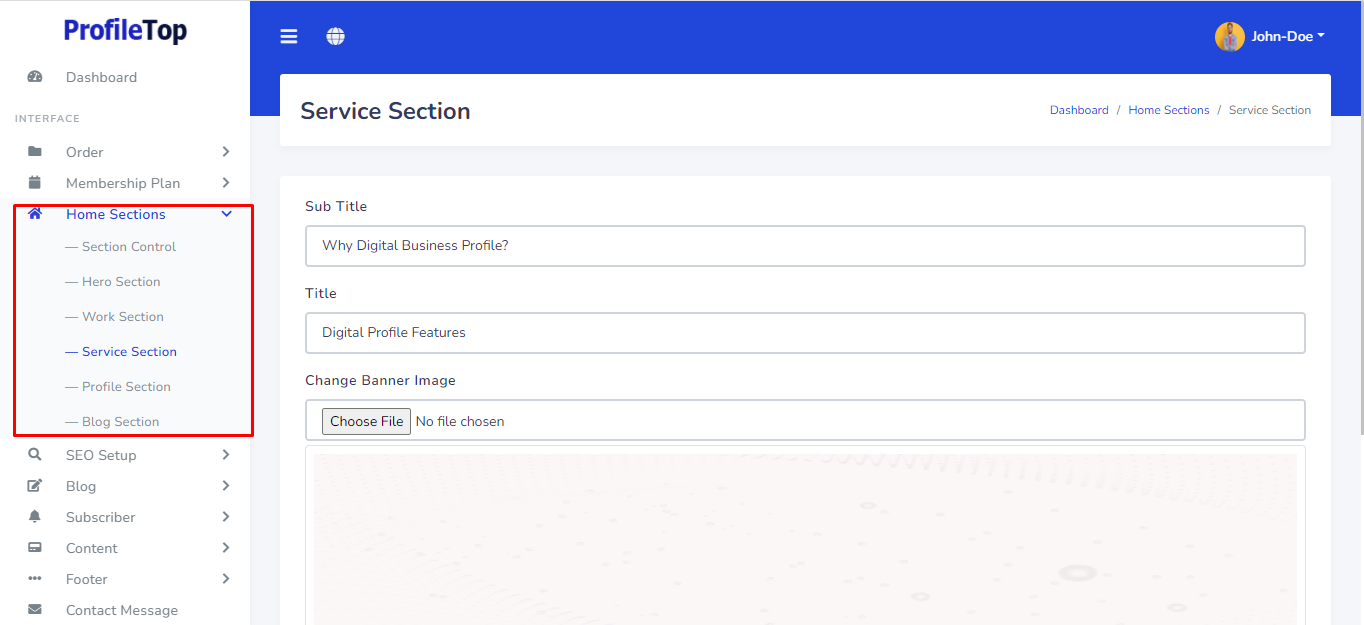
Home Page section visibility
Home page section visibility can be set up from the admin panel. Go to "Home Section > section control". And manage home page all content from in this section. See:

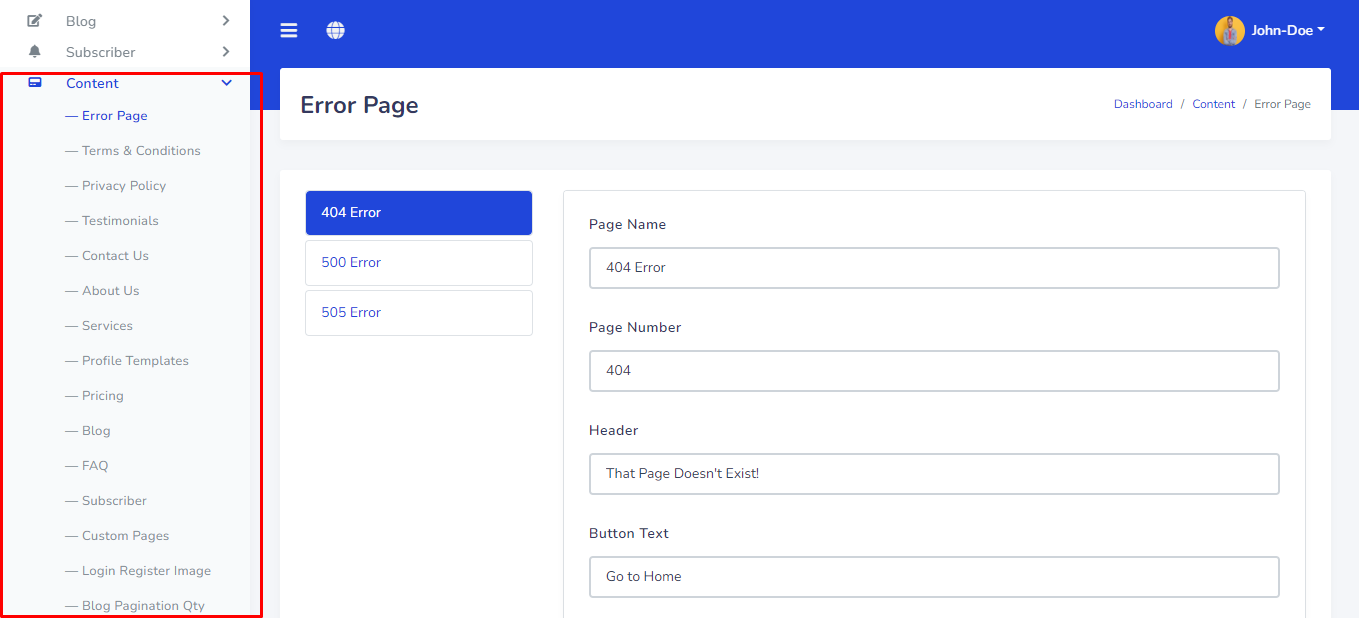
Website Content
Website Content can be set up from the admin panel. Go to "Content" from sidebar. See:

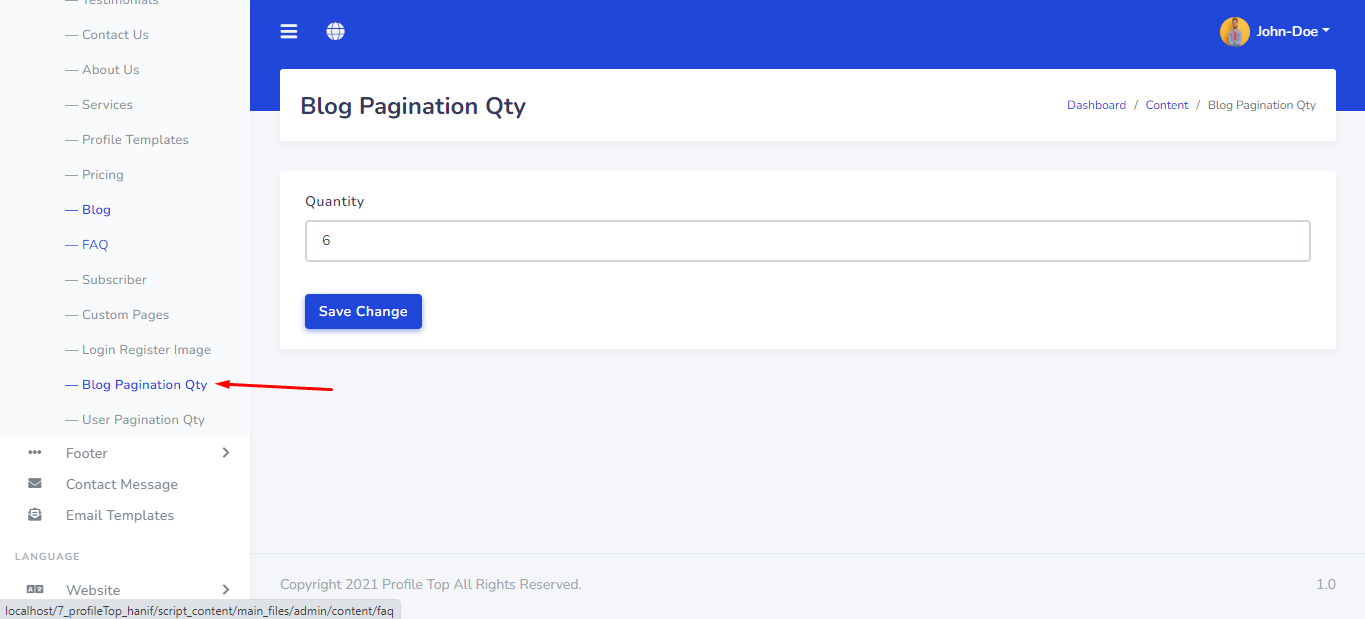
Custom Pagination
Custom Pagination can be set up from the admin panel. Go to "Content > Blog Pagination Qty" from sidebar. See:

Website Language
Website Language can be set up from the admin panel. Go to "Website > ...." and "Admin >...." from sidebar. See:


Website Footer
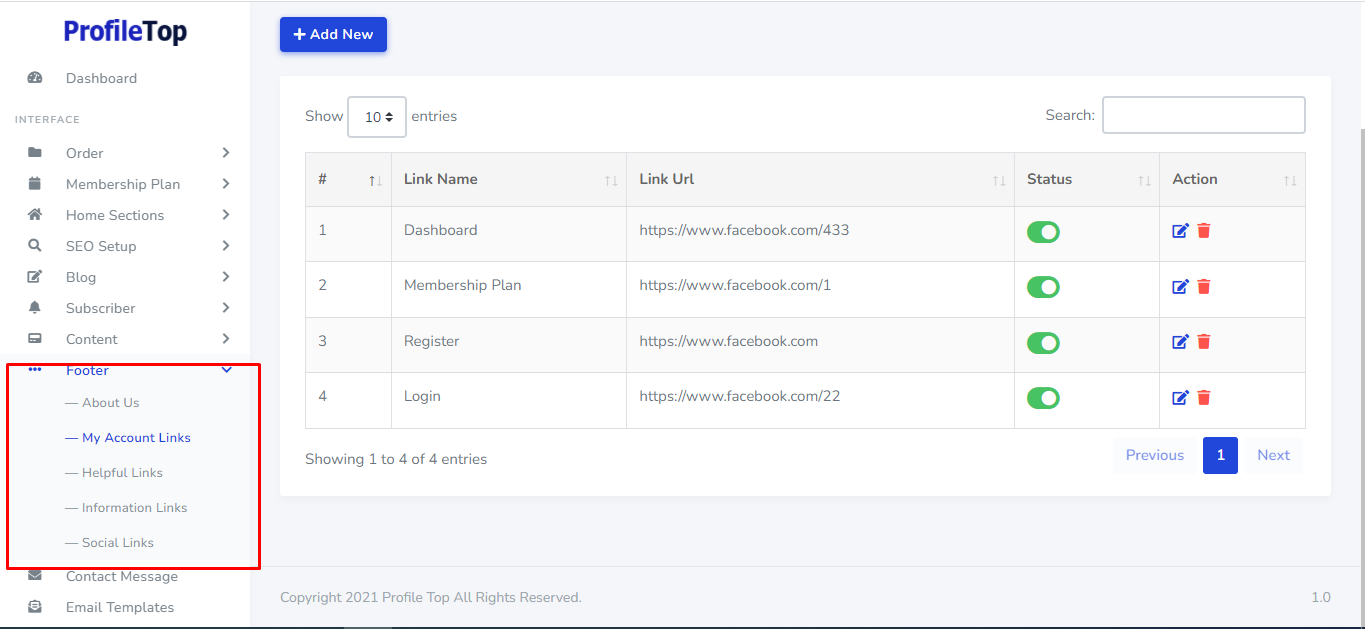
Website Footer can be set up from the admin panel. Go to "Footer > ...." from sidebar. See:
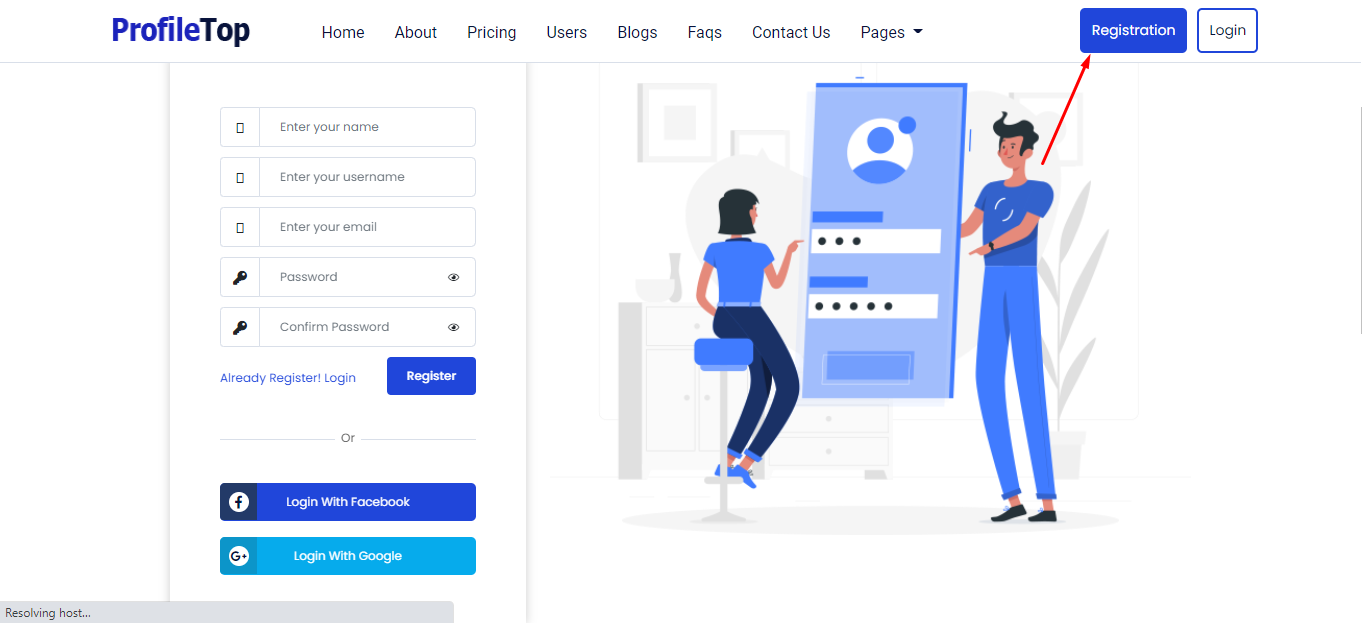
User Registration
From the top menu, User can click on registration.
User Login
From the top menu, User can click on Login.


Also login with facebook and google available here.

User Forget Password
In the login page, there is a link to reset the password if user forgets the existing password.

User Dashboard
After login, User will see his dashboard. If user haven't any membership plan , he will see own dashboard like this and he can't create his portfolio. see:


For Purchase any membership goto 'Membership' from sidebar and choose any plan. see:

Or goto root url > pricing and choose any plan. see:


User Profile
User can edit his profile and update password from topbar.
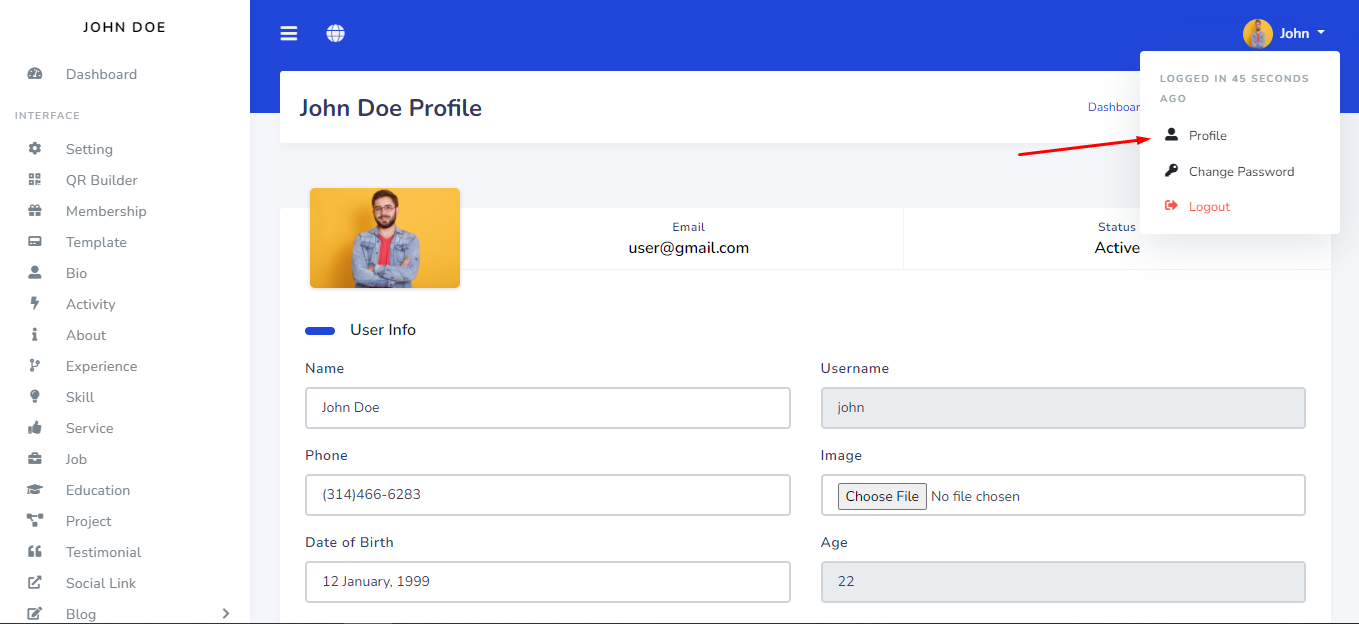
Change password
User can change his password from topbar. see:


Setting
User can manage Own SEO setup, theme color and section visibility and Layout Direction from "Setting" of the sidebar.

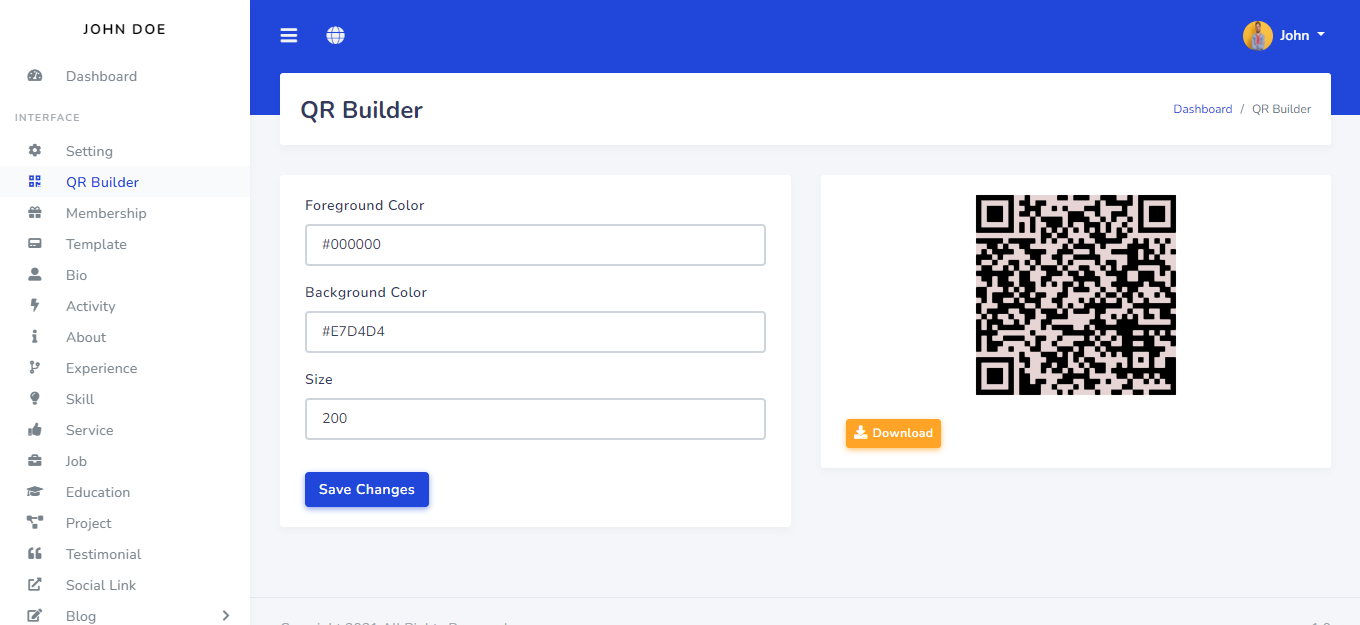
QR Code
User can manage custom QR code from "QR Builder" of the sidebar.
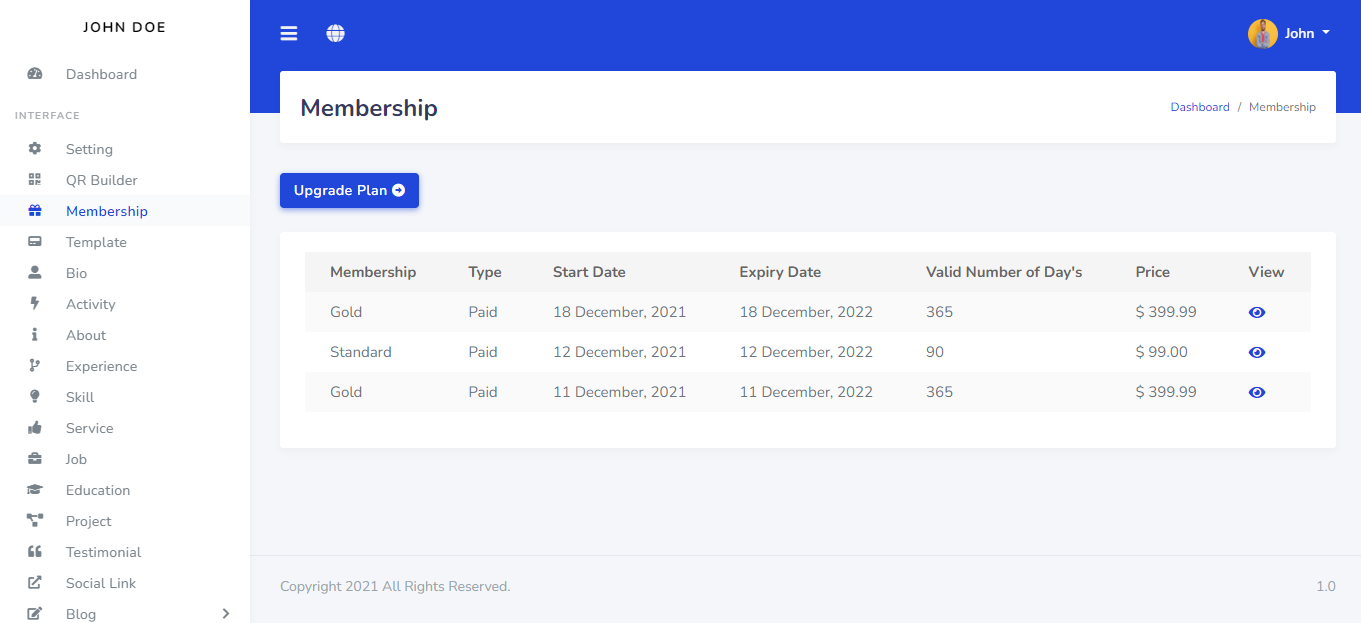
Membership
User can see his current and old membership history from "Membership" of the sidebar.
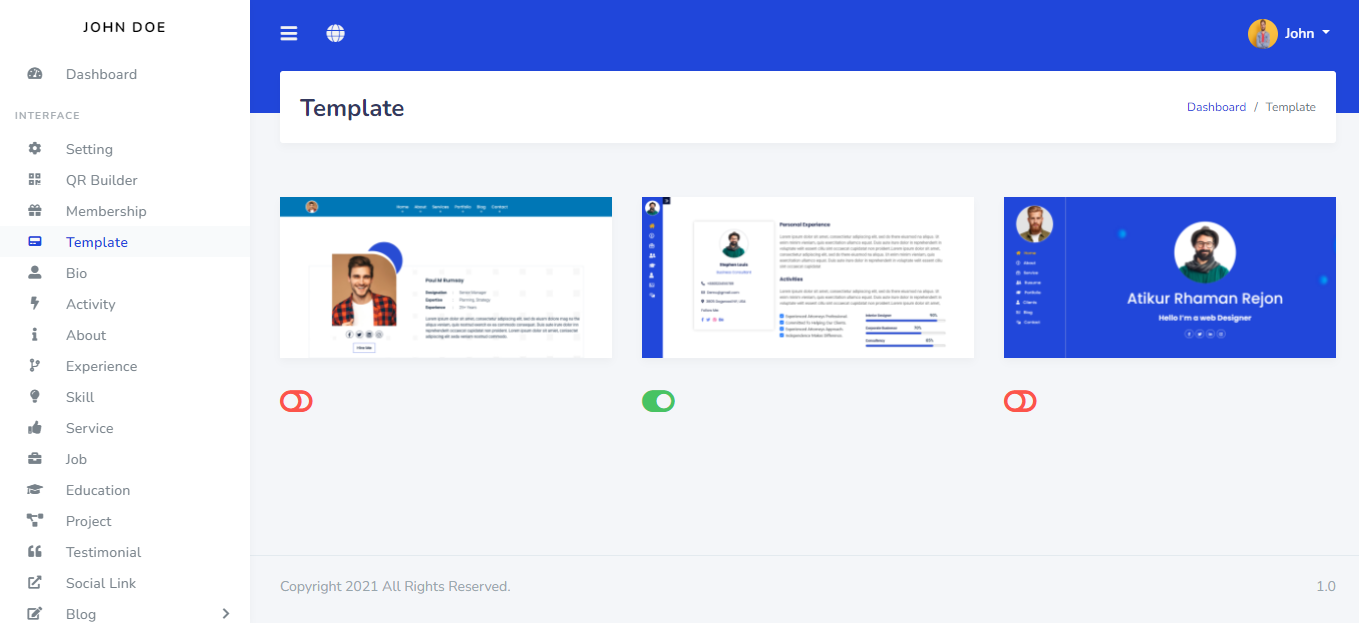
Portfolio Template
User can manage portfolio template from "Template" of the sidebar.
Bio
User can setup his bio from "BIO" of the sidebar.

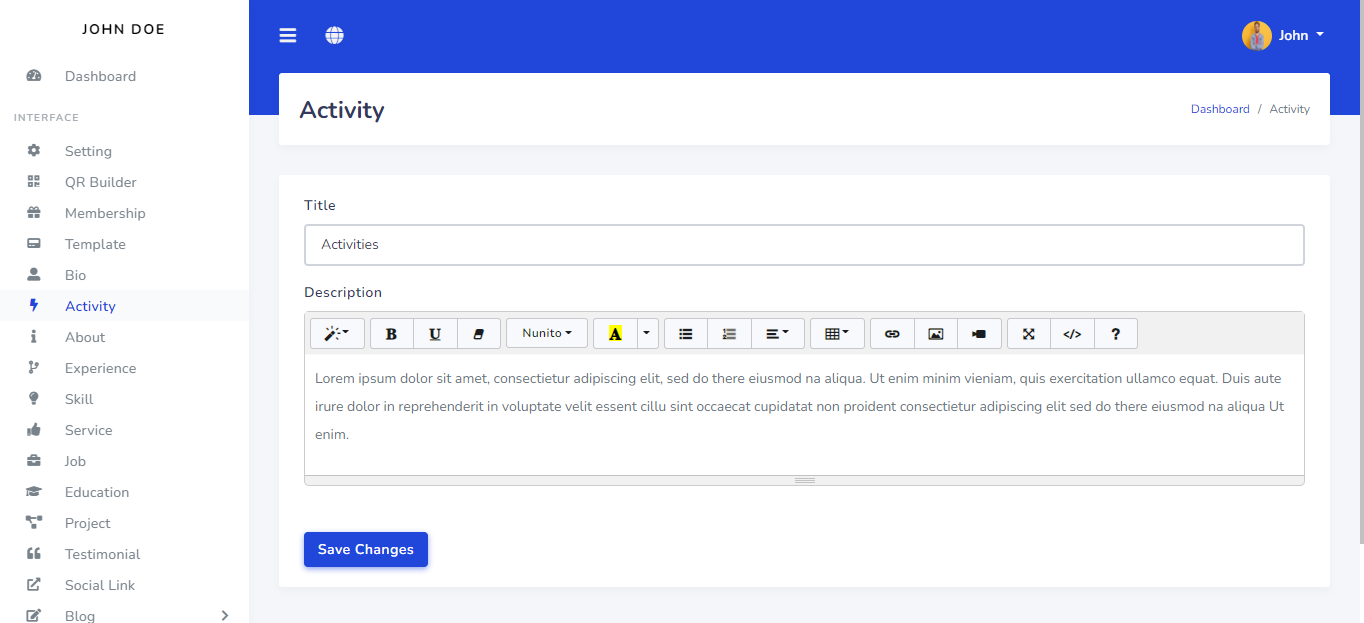
Activity
User can setup his activity from "Activity" of the sidebar.
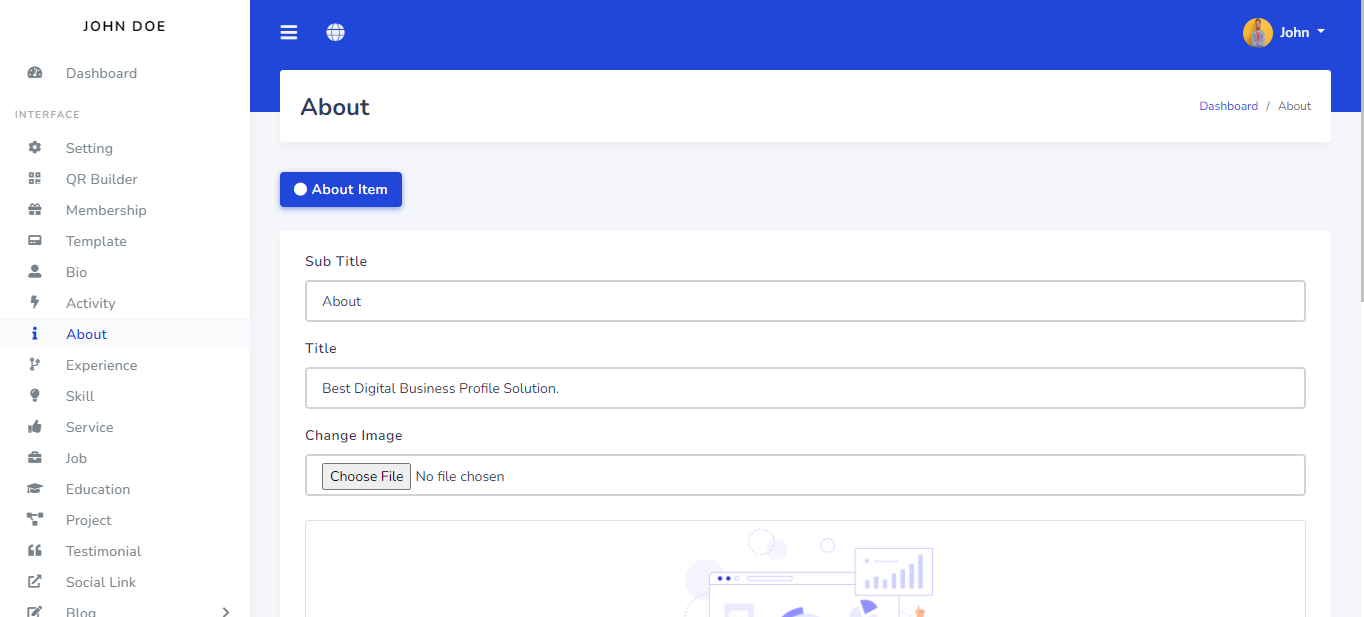
About
User can setup his about from "About" of the sidebar.
Experience
User can setup his experience from "Experience" of the sidebar.


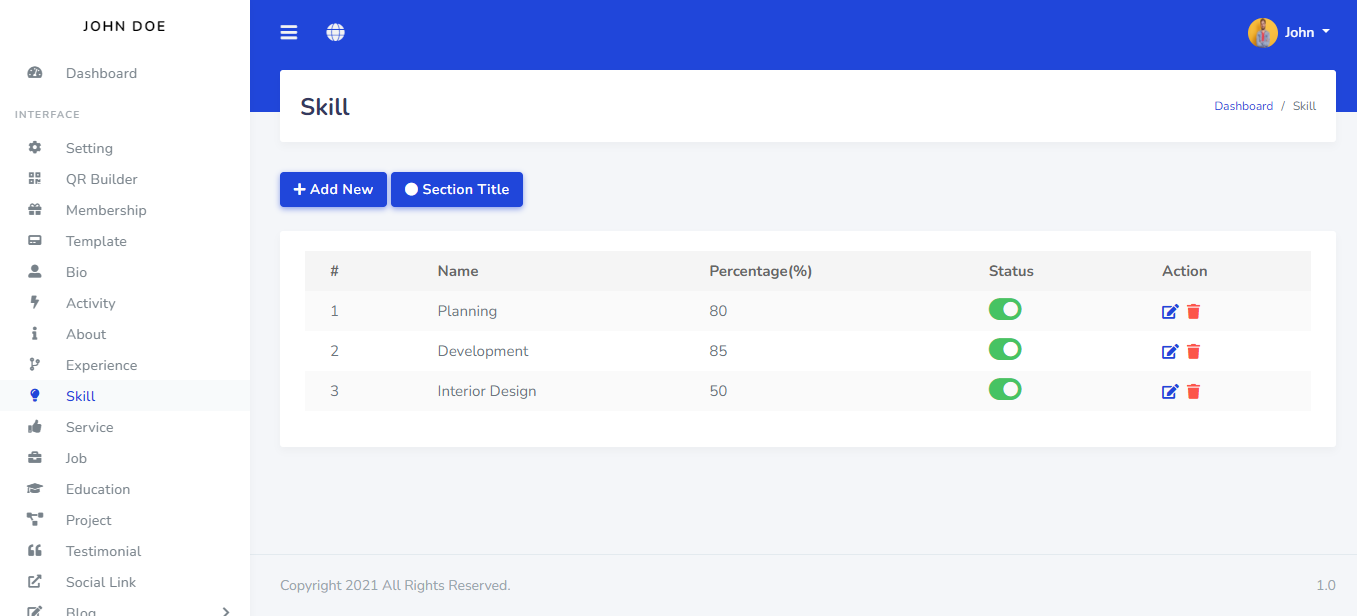
Skill
User can setup his skill from "Skill" of the sidebar.

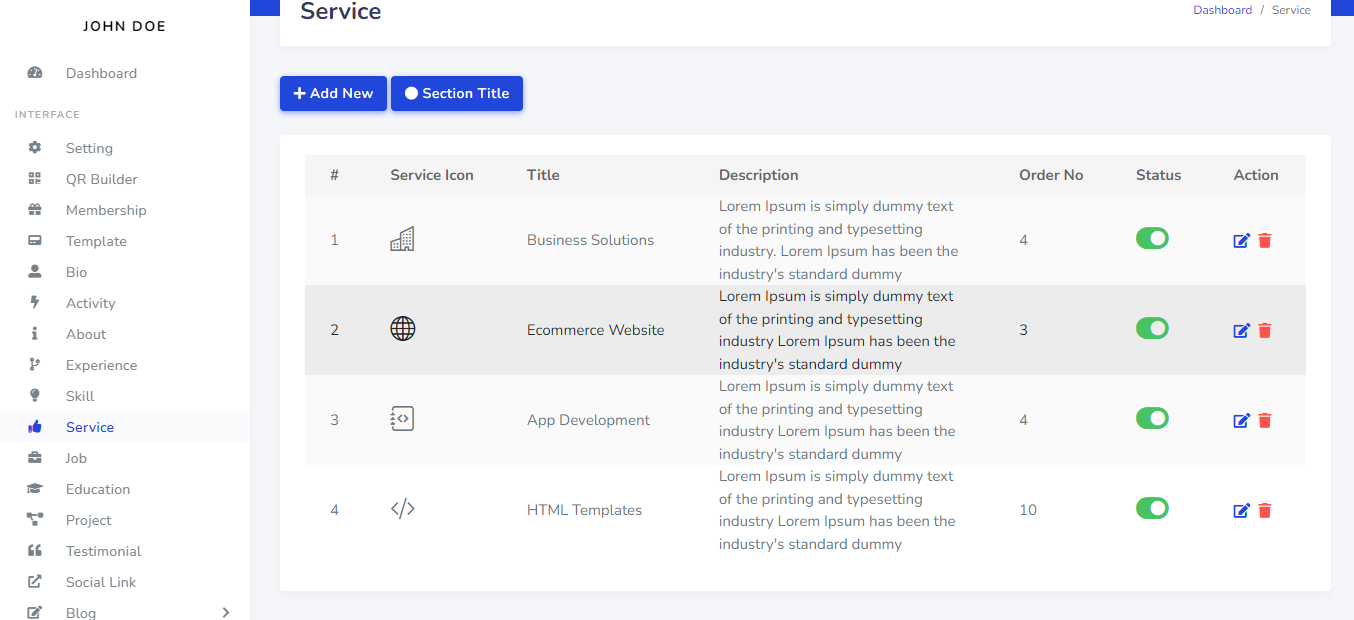
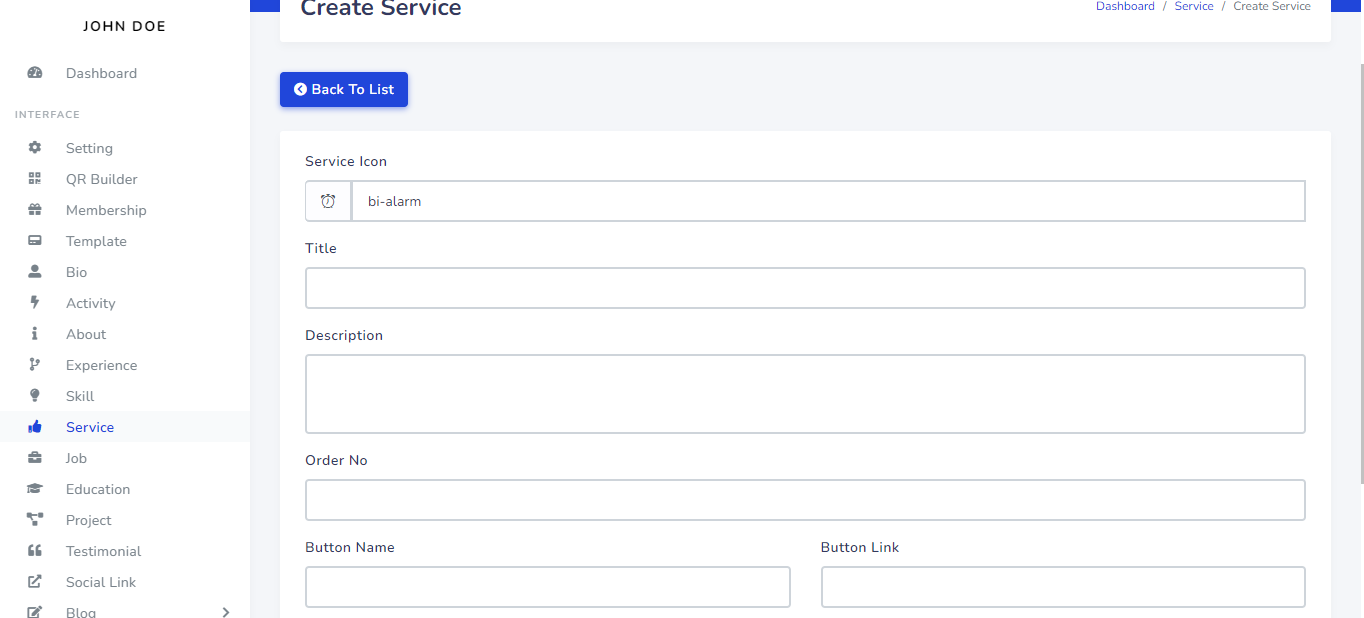
Service
User can setup his service from "Service" of the sidebar.
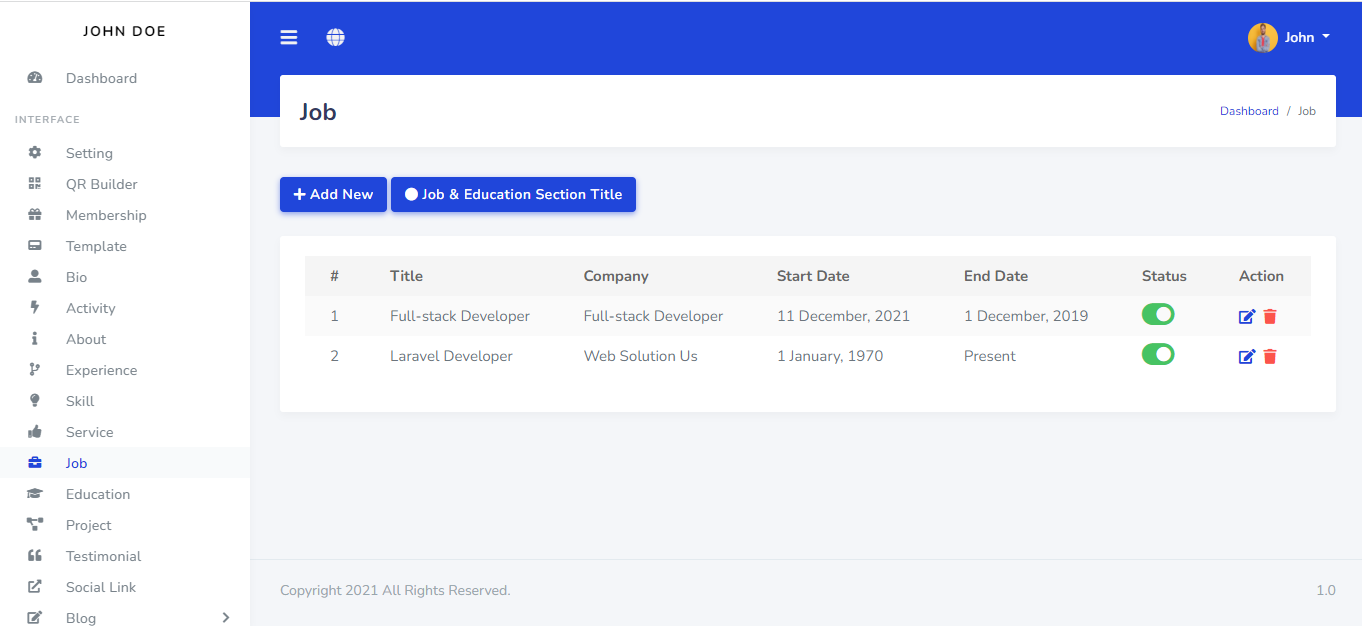
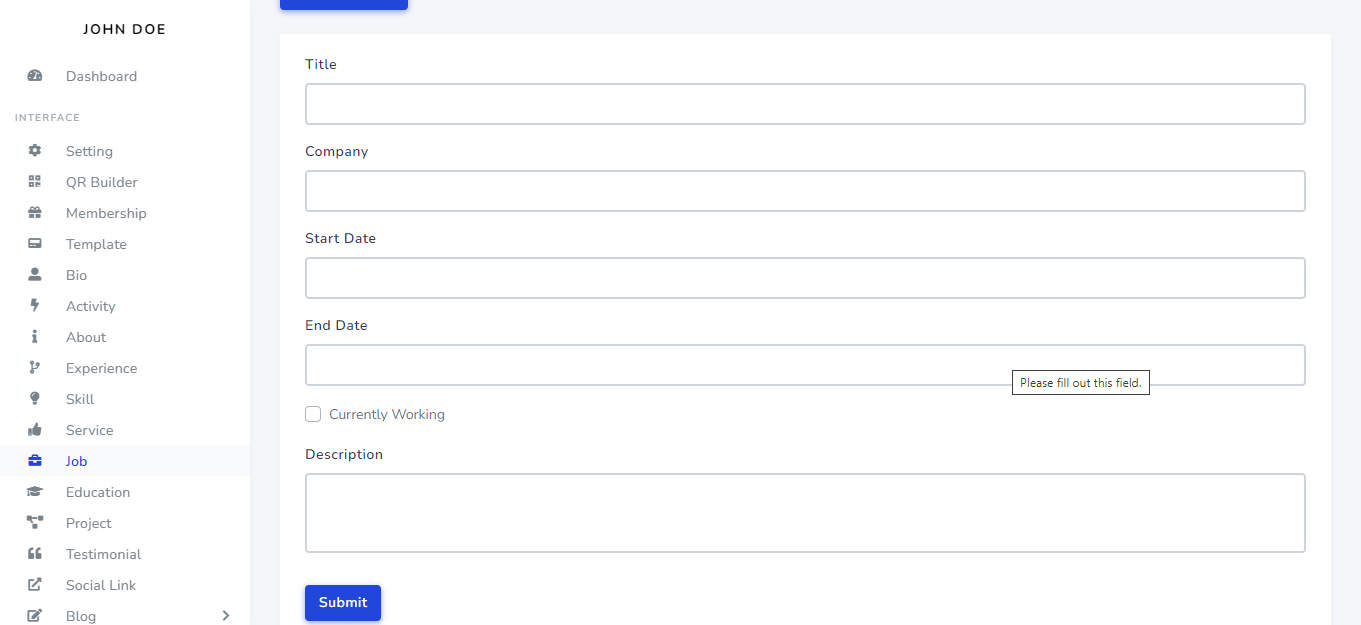
Job
User can setup his job experience from "Job" of the sidebar.
Education
User can setup his educational qualification from "Education" of the sidebar.


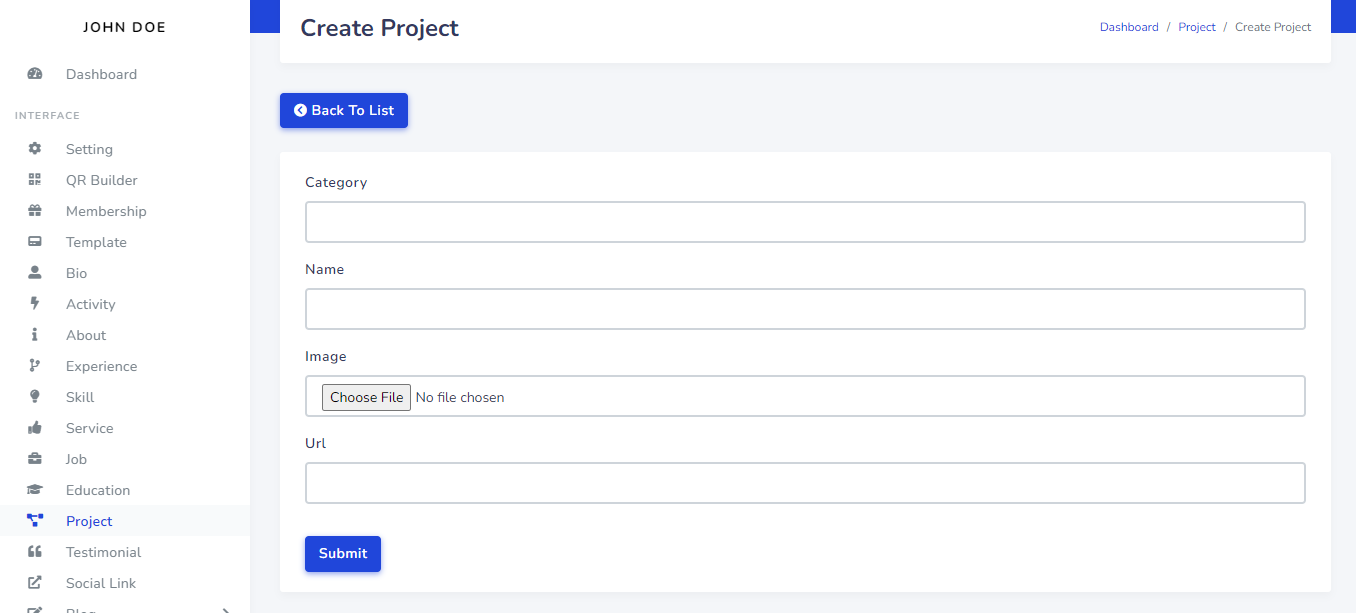
Project
User can setup his projects from "Project" of the sidebar.

Testimonial
User can setup testimonial from "Testimonial" of the sidebar.


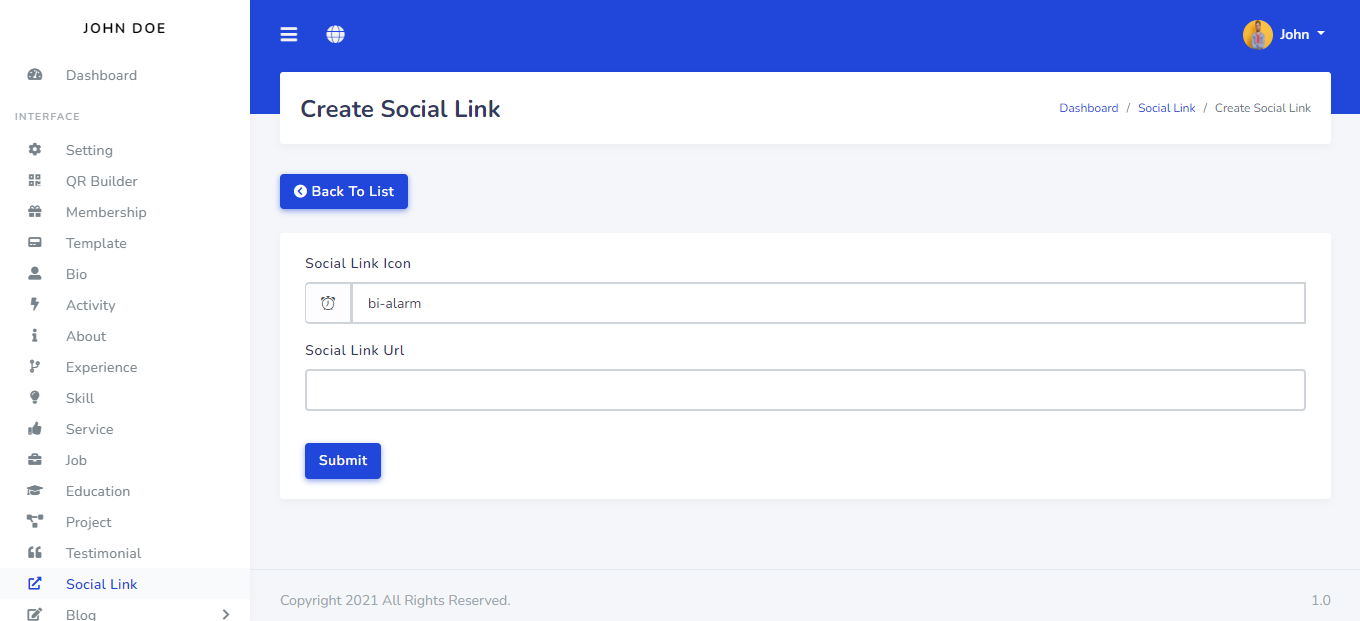
Social Link
User can setup his social media account link from "Social Link" of the sidebar.

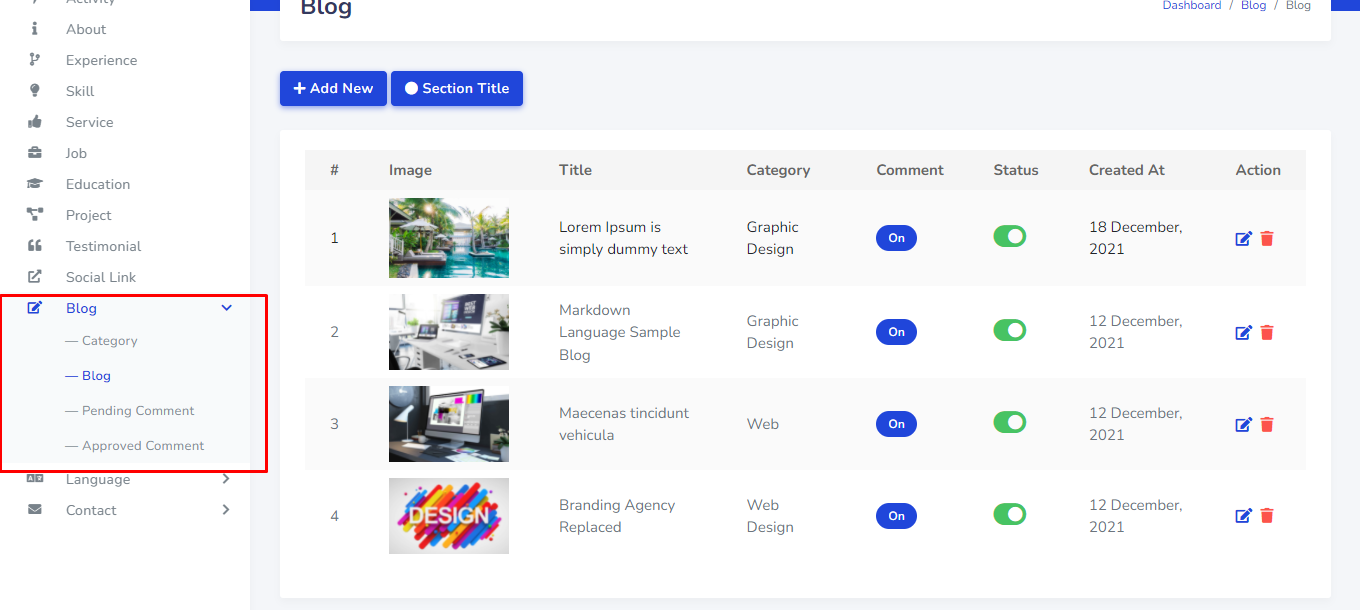
Blog
User can manage his blog, blog category, blog comment and reply from "Blog > ..." of the sidebar.
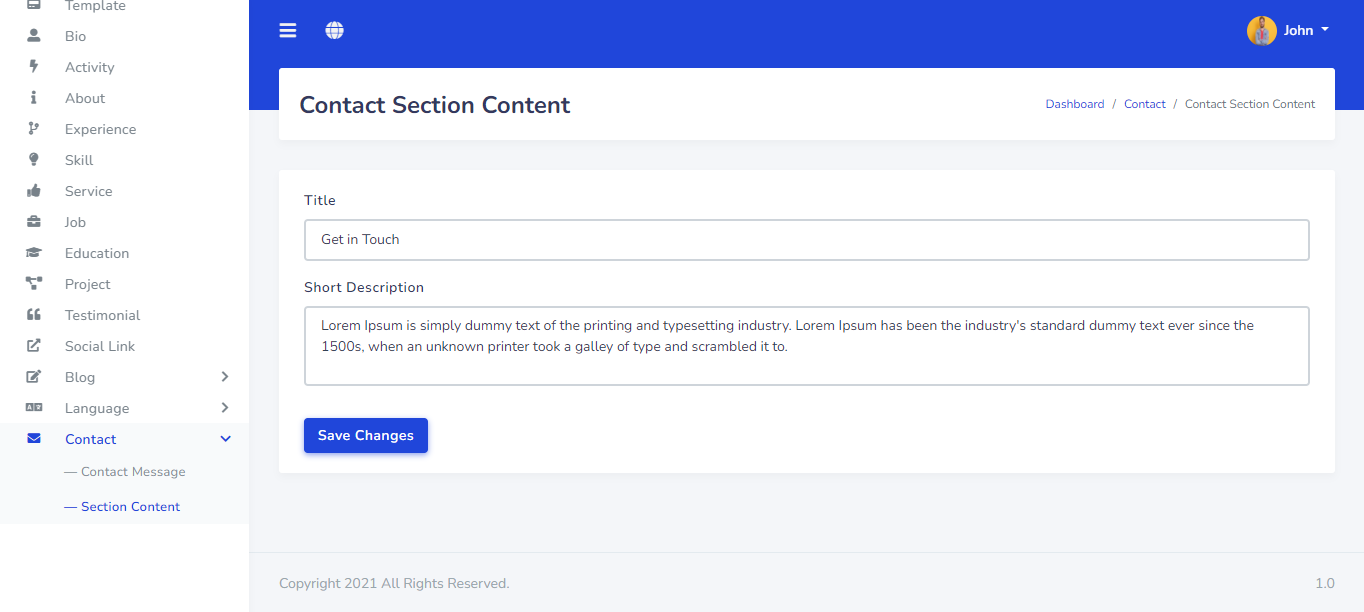
Contact Message
User can manage his contact message and contact information from "Contact > ..." of the sidebar.
Language
User can manage his own language for his profile from "Language > ..." of the sidebar.

Support
If you need any help from us, you can contact via our support email:
websolutionus1@gmail.com
Our support will reply within 24-48 hours.
How to update the script version ?
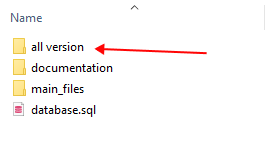
01: After download the script from codecanyon you can get a zip file. After unzip the file you can total 3
folders and 1 file.
Inside the 'all version' folder you can see version list.

02: For update any version go to the version folder and you can see a "update.zip" file.

03: Now goto your server and root project directory. Create e new folder, the name of folder is "update".

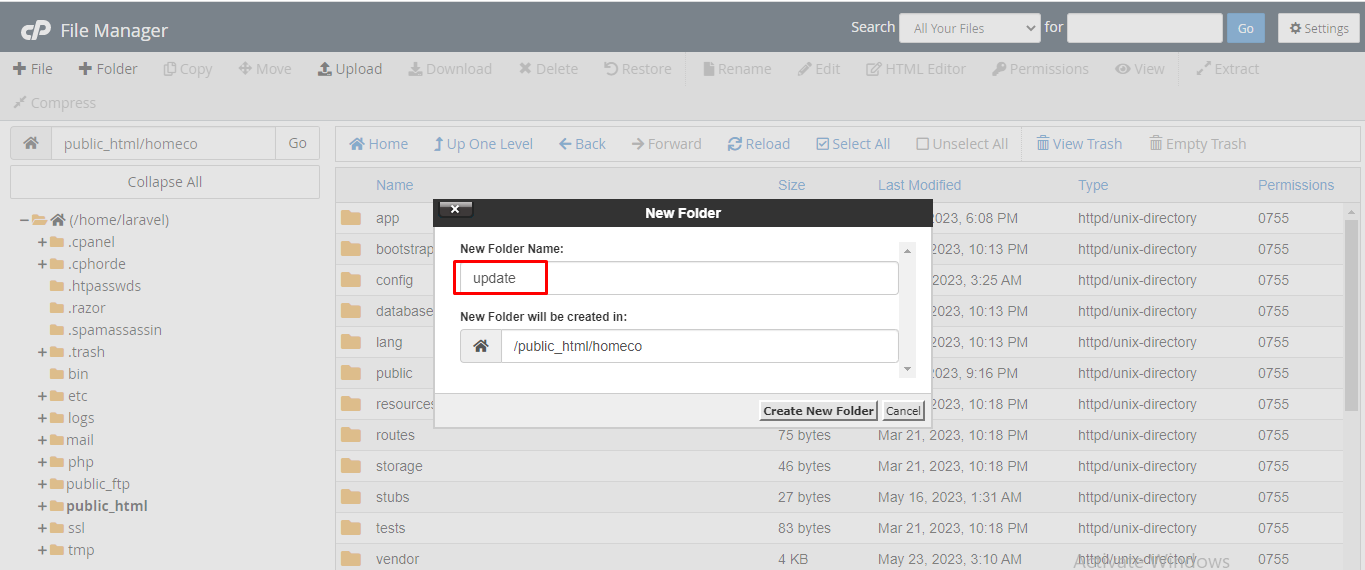
04: Inside the 'update' folder you need to upload the "update.zip" file.


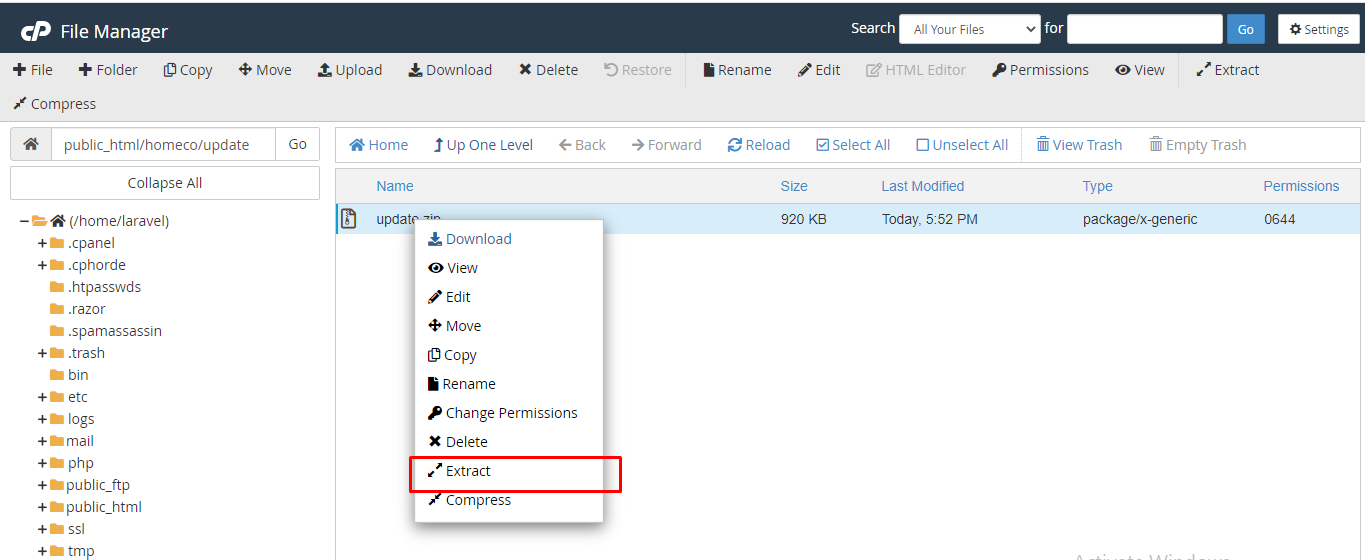
05: Now extract the zip file.

06: It will take only a few minutes. After finish, you will get a window like this.
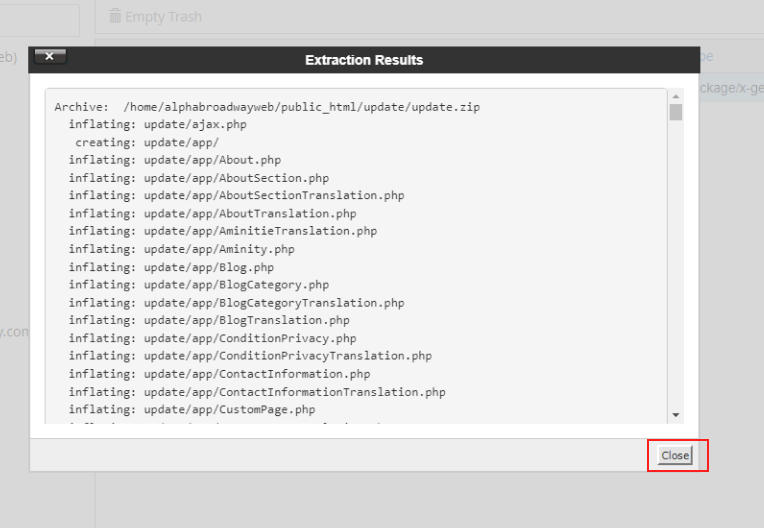
07: Now click the reload button.

08: Then double click on the "update" folder and go into there.
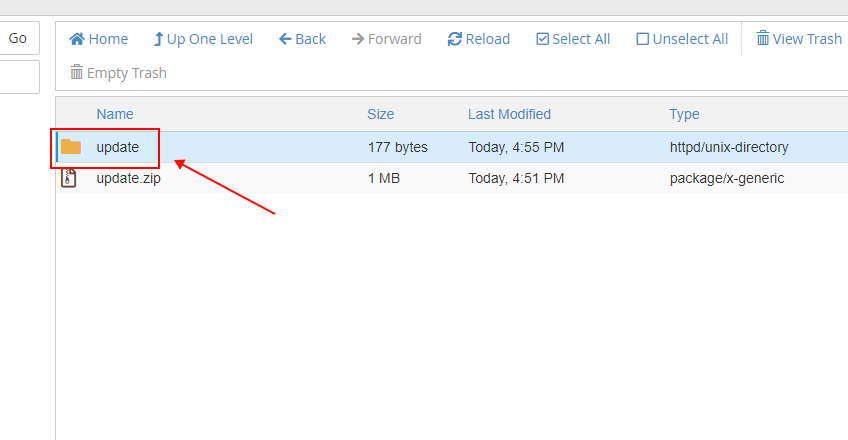
09: Now click on the "Select All" from top section.

10: Now Click on the "Move" option.

11: Delete the "update" from the box. Only keep this "/public_html/update/". Then click on "Move Files

12: Now go to your "http://your_domain.com/update".

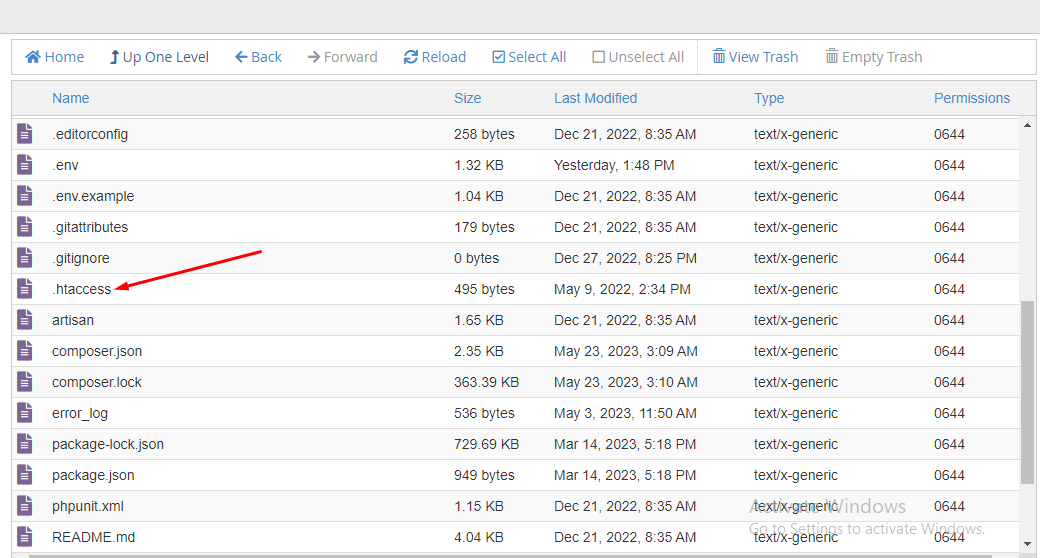
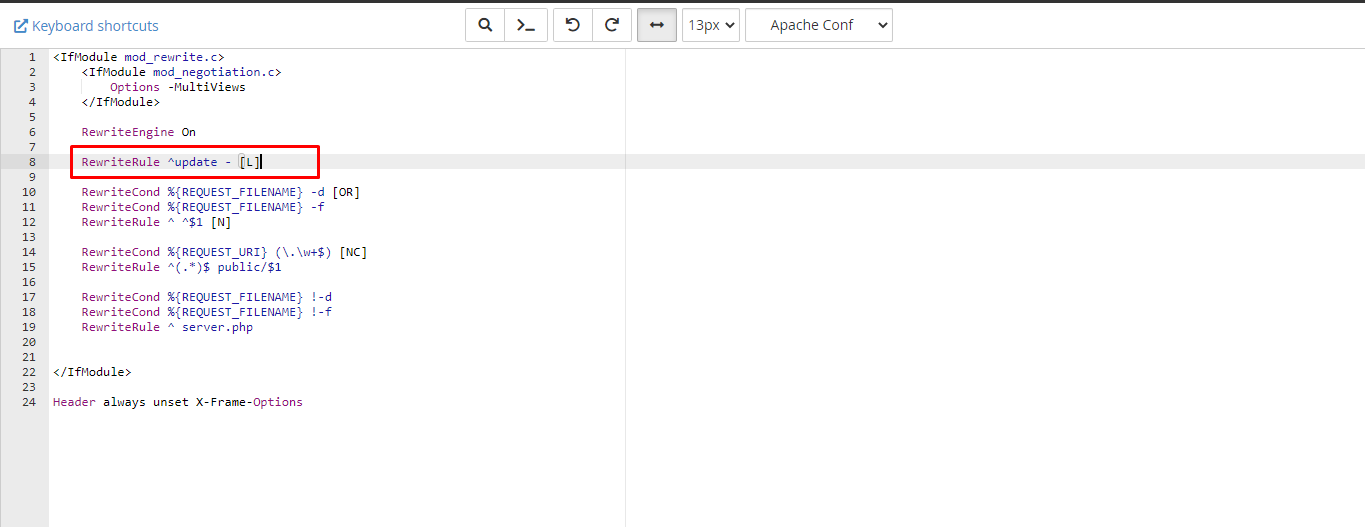
13: If your script version is less then version 2 you have to add new code ".htaccess" file. The code is "RewriteRule ^update - [L]". For add this code go to project root directory, open ".htaccess" file and past this code.


14: Now you can see our version wizard.

Verify Your Purchase code - How can you get purchase code
1. Now go to your website "http://your_domain.com".
2. Enter your purchase code here and press the check button to verify it.
How to find your purchase code
1. Log into your Envato Market account. - Click here go envato marget
2. Hover the mouse over your username at the top of the screen..
3. Click ‘Downloads’ from the drop-down menu..
4. Click 'Download' next to the item for which you need the purchase code.
5. Click ‘License certificate & purchase code’ (available as PDF or text file).
6. Here is an example of a PDF License certificate and purchase code:
Update Log History
Version 2.0
Overall:
- Upgraded Laravel 8 to 10 Version.
- Added Project Installer.
- Optimized Project Update Feature.
Version 1.2
Overall:
- Paymongo payment gateway integrated

Changed Files:
- App\Http\Controllers\Admin\Configuration\SettingController.php
- admin\pages\setting\payment-setting.blade.php
- App\Http\Controllers\FrontEnd\Payment\PaymentController.php
- front-end\pages\payment\payment.blade.php
- routes\web\admin\setting.php
- routes\web\front-end\payment.php
- resources\views\admin\js\admin-js.blade.php
- inserted last 1 new rows in admin_form_label_texts.sql file
- inserted last 5 new rows in website_texts.sql file

New Files:
- App\Http\Controllers\Admin\Configuration\PaymongoPaymentController.php
- App\Http\Controllers\FrontEnd\Payment\PaymongoController.php
- App\Models\PaymongoPayment.php
- paymongo_payments.sql

            Version 1.1

Overall:
- Flutterwave, Instamojo, Mollie, Paystack and Razorpay Payment Getway integrated
- Fixed user search issue

Changed Files:
- App\Http\Controllers\FrontEnd\Payment\PaymentController.php
- App\Http\Controllers\Admin\Configuration\SettingController.php
- views\admin\js\admin-js.blade.php
- views\admin\layouts\master.blade.php
- views\admin\pages\setting\payment-setting.blade.php
- views\front-end\pages\payment\payment.blade.php
- views\front-end\pages\user\search-user.blade.php
- views\front-end\pages\user\user.blade.php
- views\user\layouts\master.blade.php
- routes\web\admin\setting.php
- routes\web\frontend\payment.php
- database\seeders\AdminFormLabelTextsSeeder.php
- inserted last 12 new rows in admin_form_label_texts.sql
- database\seeders\WebsiteTextsSeeder.php
- inserted last 11 new rows in website_texts.sql
- database\seeders\AdminNotificationTextsSeeder.php
- inserted last 2 new rows in admin_notification_texts.sql

New Files:
- App\Http\Controllers\FrontEnd\Payment\FlutterwaveController.php
- App\Http\Controllers\FrontEnd\Payment\RazorpayController.php
- App\Http\Controllers\Admin\Configuration\FlutterwaveController.php
- App\Http\Controllers\Admin\Configuration\RazorpayController.php
- App\Http\Controllers\Admin\Configuration\MolliePaymentController.php
- App\Http\Controllers\Admin\Configuration\PaystackController.php
- App\Http\Controllers\Admin\Configuration\InstamojoController.php
- App\Http\Controllers\FrontEnd\Payment\MolliePaymentController.php
- App\Http\Controllers\FrontEnd\Payment\PaystackController.php
- App\Http\Controllers\FrontEnd\Payment\InstamojoController.php
- App\Http\Controllers\FrontEnd\UsersController.php
- App\Models\Flutterwave.php
- App\Models\MolliePayment.php
- App\Models\PaystackPayment.php
- App\Models\InstamojoPayment.php
- App\Models\Razorpay.php
- razorpays.sql
- flutterwaves.sql
- mollie_payments.sql
- paystack_payments.sql
- instamojo_payments.sql


New Folder:
- public\assets\razorpay

            Version 1.0

Initial Release
Demo
Front End: https://websolutionus.com/cc/profiletop/
Admin Panel: https://websolutionus.com/cc/profiletop/admin
Admin Panel Login: admin@gmail.com | 1234
User Panel: https://websolutionus.com/cc/profiletop/login
User Panel Login: user@gmail.com | 1234
Social Login
Social Login information can be set up from the admin panel. Go to "Setting > Social Login Settings". See: